
Wotja 19 is now retired. Get the latest version of Wotja!
Wotja User Guide
Guide 19.10.0 - 25th October 2019 |
This User Guide is for both the Free or Free with Subscription versions of Wotja V19.
The Free with Subscription versions are only available for iOS/macOS and they support operation in one of 2 different 'Feature Set' tiers. This means there are features detailed in this User Guide that are only active and available to those with the relevant 'Pro' tier. See Feature Sets.
Quick overview:
- 'Free Mode' (Default): 'Free Mode': 10 mins Music Play Time Timeout ('MPTT'); Track 1 editing only, Ch1 MIDI In/Out only + various other feature limitations; Mix recording: Check EULA for permitted use.
- 'Pro': 8 hours Music Play Time Timeout (MPTT) and unlocks multi-track editing, multi-channel MIDI In/Out and all other limitations.
* An active Long Play ('LP') Subscription will disable the Music Play Time Timeout (MPTT) for any Feature Set.
Don't like subscriptions? Get the paid-for Wotja Pro 19 app.
Wotja Platforms, Devices & Languages
Platforms: iOS, tvOS, macOS, Windows, Android | Apple TV, Fire TV
Devices: iPhone, iPad, iPod touch, Mac, PC, Laptop, Tablet, Mobile | Apple TV, Fire TV, Android TV
Languages: English, Chinese, Japanese
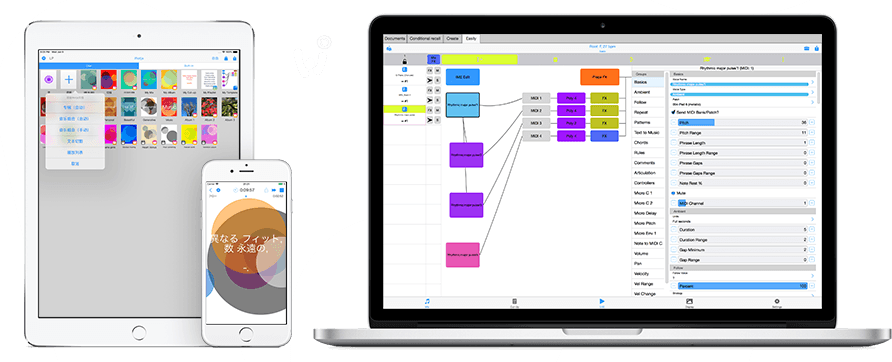
Wotja ( "wot-jah") is a unique & powerful generative music creator, lab and player system.
It creates live generative music, MIDI, melodies, cut-up text and beautiful ambient soundscapes.
With it you can find ideas & inspiration, have fun experimenting or even just relax!
Users say: "Great app, complex, deep and unique", "Simply the best", "Masterpiece"
What you can do with Wotja
- It's a Music Creator: Use generative music, text-to-music and randomization techniques for quick & interesting results
- It's a Music Lab: Experiment with adaptive, reflective & generative music composition, mixing, sound design and scripting
- It's a Music Player: Auto-generate or playlist beautiful ambient soundscapes for relaxation, reflection, meditation, sleep & mindfulness
- It's a Lyric Generator: Use the 'cut-up' technique to create ideas for song lyrics, haiku, poetry etc.
Quick Start
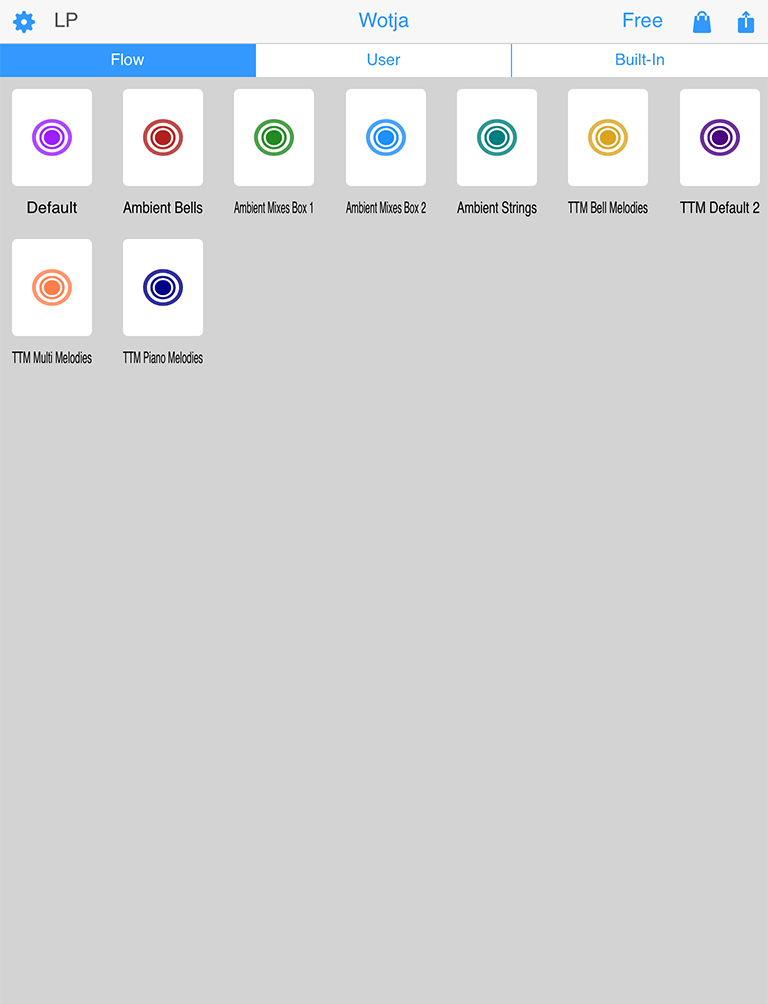
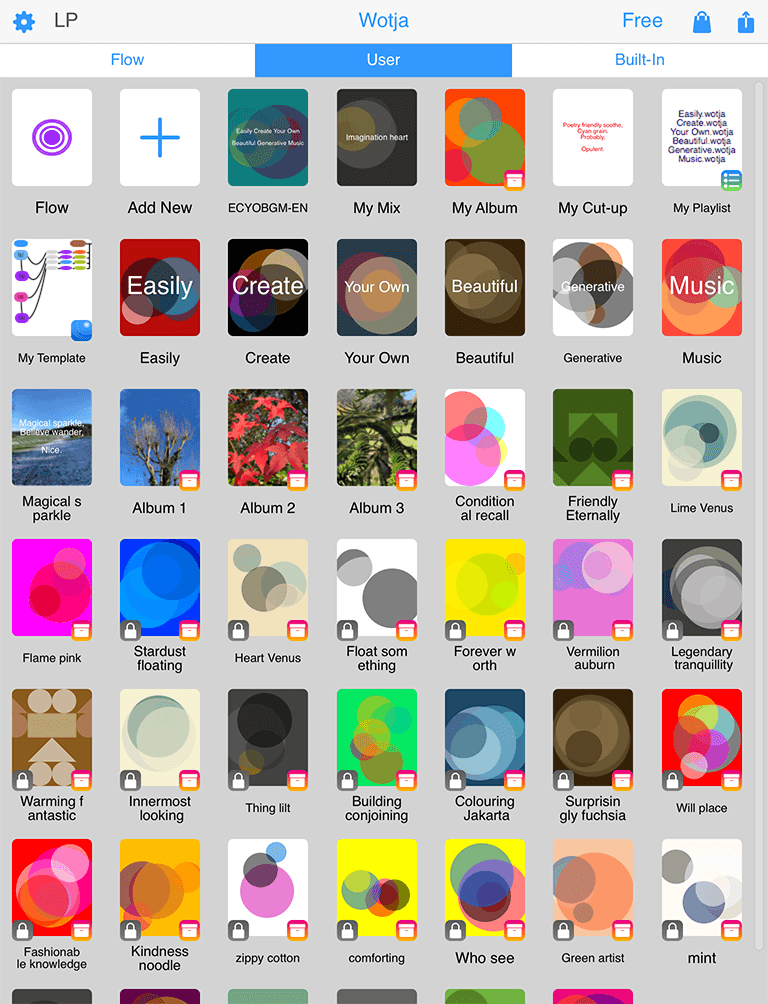
On starting the app you will see the Documents screen with 3 segments - 'Flow', 'User' and 'Built-In'.
'Flow' Segment - Generate a succesion of mixes
Select the 'Flow' segment and tap any one of icons. Each icon will load the 'Flow Player' with a particular Randomization Scheme. Flow mode will then start generating a succession of freshly mixed generative music mixes.
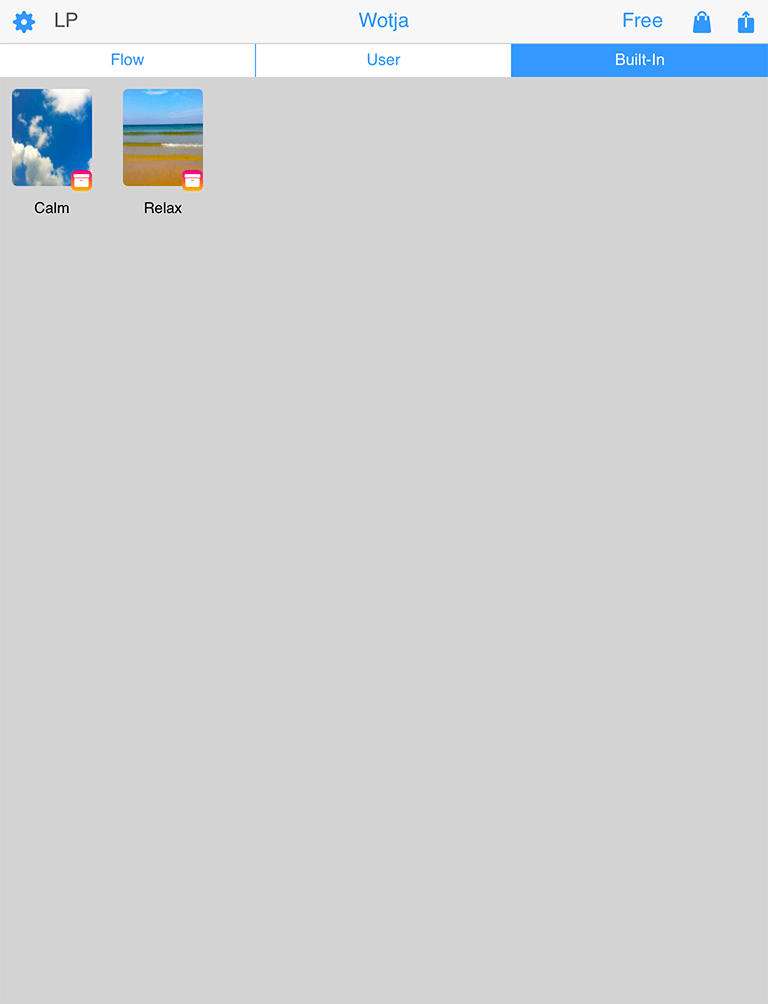
'Built-In' Segment - Play a Built-In 'Album'
Tip: 'Albums' are a special kind of built-in play-only Box that does not allow exporting of mixes or Mix Overrides.
Select the 'Built-In' segment and the top view selector control and tap the thumbnail of the Album you want. It will then start playing in the Box Player.
Desktop Menu
Wotja App name (macOS)/File (Windows) | Options | Window | Help
The Desktop Menu (macOS/Windows) is where you can:
- Quit/exit the app
- Show the Wotja data folder
- Select your Audio Output device
| UI Item | Description |
Menu Bar |
|
| Desktop Menu |
|
Documents Screen
The Documents screen is what you see after you have launched the app. It is where you can:
- Select one of three different file views (segments): 'Flow, User' or 'Built-In'
- 'Flow' segment:
- Start the 'Flow Player' and use it with the named Randomization Scheme
- 'Built-In' segment:
- Load a Built-In Album (e.g. Calm or Relax)
The only difference in display of this screen in Desktop and Mobile versions is that in the 'User' segment in the Desktop version you can have multiple files (mixes, playlists, Boxes and Albums) open, each one shown in a different tab at the top of the screen.
- Tip: To close an open tab in the Desktop version use Cmd+W (macOS) or Ctrl+W (Windows).
iOS/macOS: When you first start the app you're prompted if you want to use iCloud or Local. Go your device's iCloud Settings screen, scroll down that and look for this Wotja app and go into that screen. You will see a "Use iCloud" toggle and you then set it as you wish. See iCloud Settings.
Filetypes:
- The files that this Wotja app can open directly are: .wotjabox ('Box').
- See the FAQ: File Management - Where should I put or look for App Files?.
| UI Item | Description |
 Settings Settings |
Go to Settings screen. |
 Action Action |
|
 File View Control File View Control |
Tap to select either the 'User' or 'Built-In' File view:
|
 Flow button Flow button |
Tap a Flow button to start the 'Flow Player' mode.
|
 Album Thumbnail
 Add New
 Saved File Thumbnail
 Filename
 .wotjalist Thumbnail
 .wotjabox Thumbnail
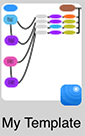 .noatikl
Flow Player

The Flow Player is opened from the Documents screen as follows:
- 'Flow' segment: Tap a Flow button and the Flow Player will start generating according to the named Randomization Scheme.
- 'User' segment: Tap the Flow button and the Flow Player will start generating according to the user selected (or default) Randomization Scheme.
It is used to:
- Generative a succession of freshly created mixes whose play time is governed by the Mix Duration values in Settings.
- Playback will continue until either the Sleep Timer kicks in (if active) or the Music Play Time Timeout (MPTT) is reached.
- How each mix is generated depends on the various settings in the currently selected Randomization Preset.
The maximum Play Time is governed by the value of the Music Play Time Timeout (MPTT). Once it has been reached music playback will stop. Press the relevent Wotja play button to restart play.
| UI Item | Description |
 Back Back |
Takes you back to the Documents screen. |
 Settings Settings |
Takes you to the Settings screen. |
 Play Time Remaining Play Time Remaining |
Shows the total Play Time remaining before Wotja will stop playing. The maximum this can be is governed by the value of the Music Play Time Timeout (MPTT). Tap the Sleep Timer button just to the left of the Play Time Remaining indicator to go to the Settings Screen where you can set the Sleep Timer. When there the Sleep Timer is on the button looks more solid. |
 Lock Lock |
Locks the mix so that it is restarted when it reaches its end rather than another being generated. |
 Next Next |
Forces another mix to be generated. |
 Flow Flow |
Shows that you are in Flow mode. |
 Action button Action button |
Visit the User Guide online with the Help & More item. |
 Flow Mix Play Time Flow Mix Play Time |
Shows the Play Time remaining for the current Flow mix. Tip: To change how long mix will play for try changing the Duration/Max and Duration Max/Range values in Settings to override what is in the Preset. Doing that lets you override what is in the Preset. It's fun! |
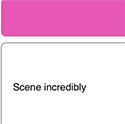
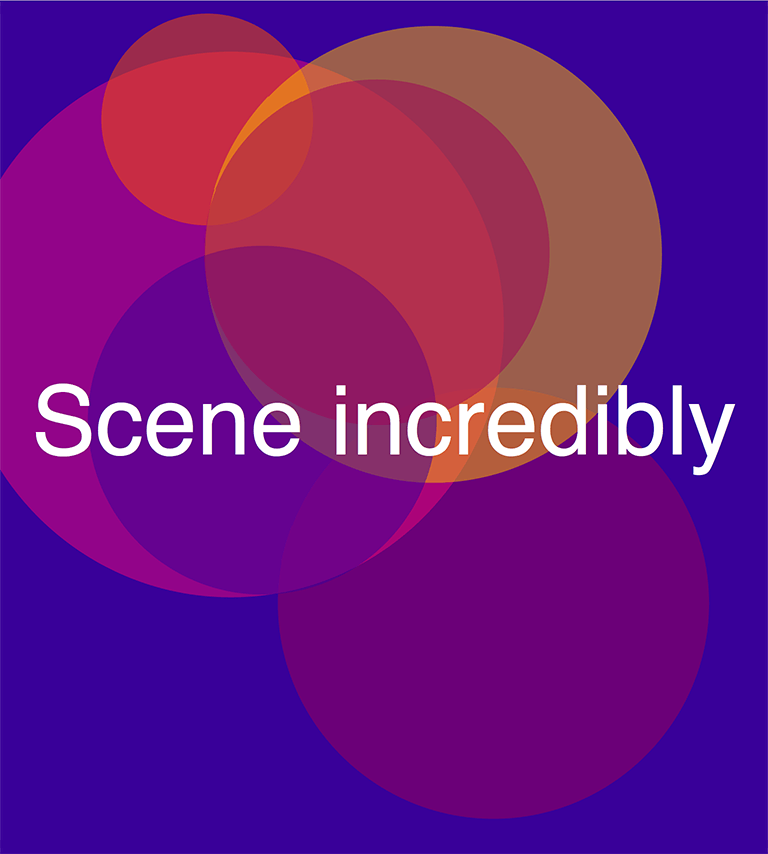
 Display Text Display Text |
Whether any text is displayed here depends on Icon Text value used by the Randomization Preset (Settings > Randomization). The text is present in the underlying mix file and can be Cut-up or TTM text. Tip: To change what is displayed try changing the 'Icon Text' value in Settings. Doing that lets you override what is in the Preset. It's fun! |
 Background Background |
The background used in Flow Mode depends on the Icon Pallete and Icon Graphic values used by the Randomization Preset (Settings > Randomization). Tip: To change what is displayed try changing the Icon Pallete and Icon Graphic values in Settings. Doing that lets you override what is in the Preset. It's fun! |
Box Player
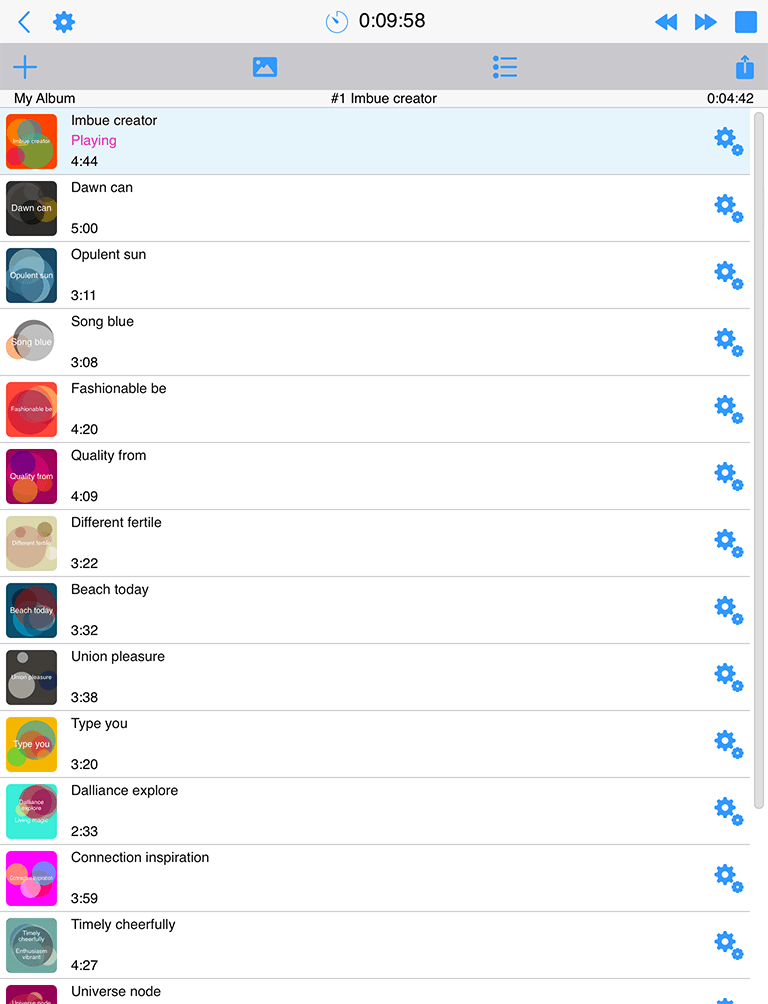
The Box Player is used to play Box files, Playlists and Albums. It is opened from the Documents screen as follows:
- 'Built-In' segment:
- Tapping on a Built-In 'Album'
It is used to:
- 'User' segment:
- If you install any 3rd party Box you will see and can play them from here.
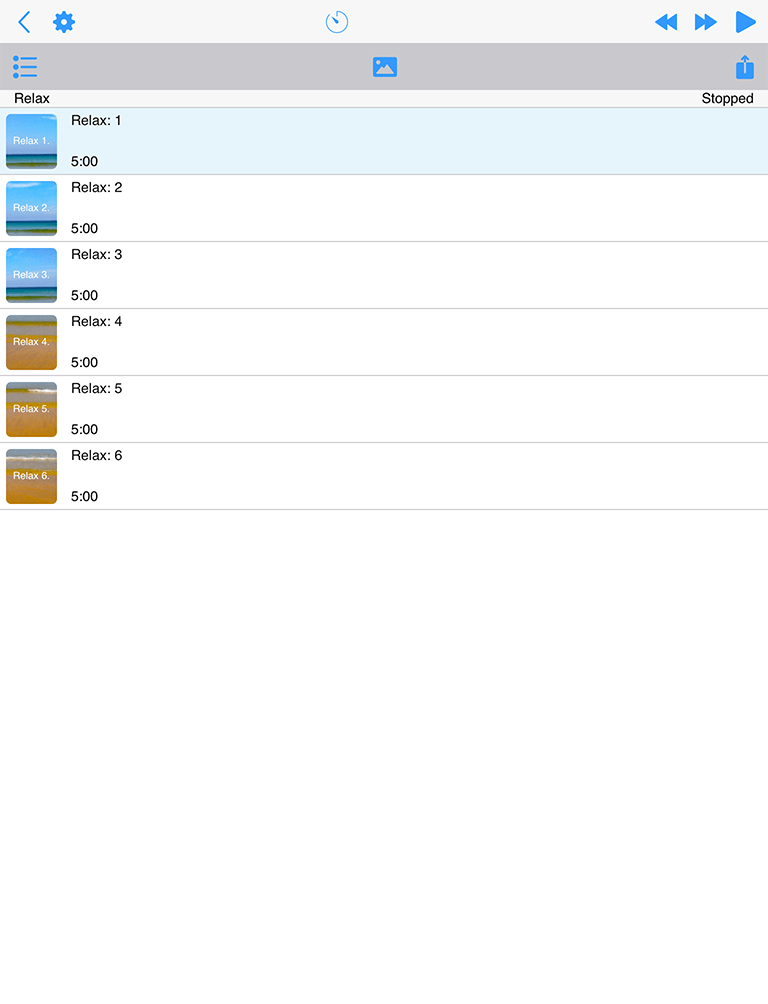
- 'Built-In' segment:
- Play a built-in 'Album' (currently 'Calm' and 'Relax')
The maximum Play Time is governed by the value of the Music Play Time Timeout (MPTT). Once it has been reached music playback will stop. Press the relevent Wotja play button to restart play.
| UI Item | Description |
 Back Back |
Takes you back to the Documents screen. |
 Settings Settings |
Takes you to the Settings screen. |
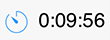 Play Time Remaining Play Time Remaining |
Shows the total Play Time remaining before Wotja will stop playing. The maximum this can be is governed by the value of the Music Play Time Timeout (MPTT). Tap the Sleep Timer button just to the left of the Play Time Remaining indicator to go to the Settings Screen where you can set the Sleep Timer. When there the Sleep Timer is on the button looks more solid. |
 Previous Previous |
Takes you to the previous playlist item. |
 Next Next |
Takes you to the next playlist item. |
 Sequential Play Sequential Play Random Play Random Play |
Tap to toggle between sequential and random play. |
 Action Action |
|
 Box/Playlist/Album Name Box/Playlist/Album Name |
The name of the Box/Playlist/Album (left of status bar). |
 File Name File Name |
The name of the currently selected File (middle of status bar). |
 File Play Time File Play Time |
Shows the Play Time left for the current file (right of status bar). This value can only be adjusted in Mix Overrides (Box file only). |
| Box/Album Thumbnail | Tap the thumbnail to go to Full Screen display (see below). |
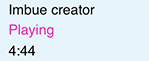 |
The top line is the file name. The center line displays "Playing" when the file is playing. The bottom line displays the minimum and maximum piece time. These values are set in Mix Overrides (Box file only). Tap the central area to play or stop the file. When the file is playing the item will be a light blue colour. |
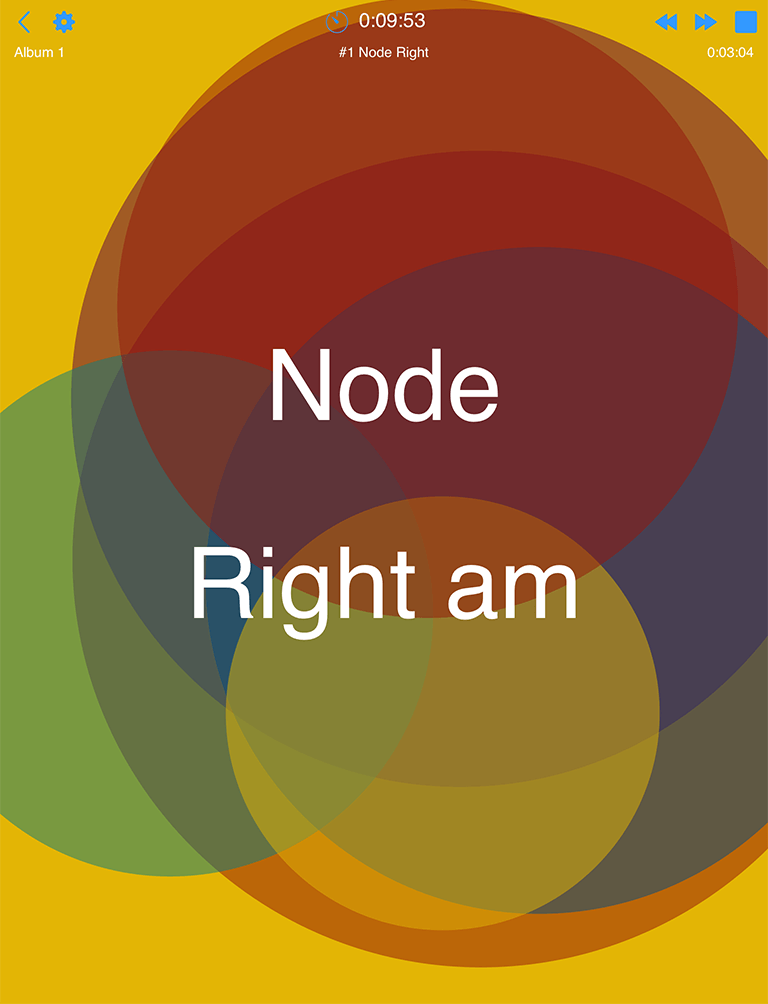  Fullscreen Fullscreen(click image for large) |
Fullscreen display is for when you want to sit back, look at any included image/message and reflect on the music. When you first go into Fullscreen display a faint white toolbar appears at the top to help you see the controls. Tap in the center of the screen to return to the Box player screen. |
 Add Item
 Box/Album Thumbnail

Editing Modes
See: 'Free Mode' & Limitations
See the Video: Wotja iOS: Quick Start (4m)
Important: The Editing Mode is entered by opening a .wotja file from the Documents screen.
Wotja is a very powerful creativity tool for creating and sharing generative music mixes and cut-up ideas.
The Wotja mix files it can save contain everything Wotja needs to play and display what you have created (excepting any locally referenced items, e.g. .zip, .sf2, .wav, .ogg, .midi files; these are not saved to mix files).
This means a Wotja mix file contains generative music parameters, sound network configurations and settings, text , display settings and even a background image - what is saved to the file depends on what you have added to it.
In order to edit the different kinds of parameters/settings that are stored in the file we have three distinct editing modes in Wotja X. These modes are refered to as "Mix", "Cut-Up" and "Display". The parameters/settings used in each of these modes are saved to the Wotja file.
Each of these three modes is accessed via a "tab" on the bottom tab bar in Wotja, which is different in Wotja/Wotja X.
Editing Modes

Editing Modes
-
Mix: Where you "design" your wotja, meaning accessing parameters for the Intermorphic Music Engine (IME) and Intermorphic Synth Engine (ISE) to define how the music is generated and what sounds are used, adding TTM (text), mixing voices and templates and setting cell rules for arrangement.
Note: Displayed via the top toolbar segment control, the Mix mode features 5 different right hand panel views of data (two of the panels are accessed by one of the segments). Each of these provides access to different controls that let you set up much of how your wotja works.
- Cut-Up: Where you have access to a powerful cut-up text editor to stimulate ideas for creative writing.
- Display: Where you decide how you want your wotja to look, this being important should you wish to share it.
Common Controls
In addition, and so they are accessible throughout the app, we include two other controls:
- Play/Stop button: [bottom tab bar] Tap to stop or start your the generative mix (if any) in your wotja. There is an indicator beneath the button that shows how long your mix has been playing for.
- Settings: [bottom tab bar] Takes you to the Settings screen where you can change Mix and Randomization related settings (including Template selection).
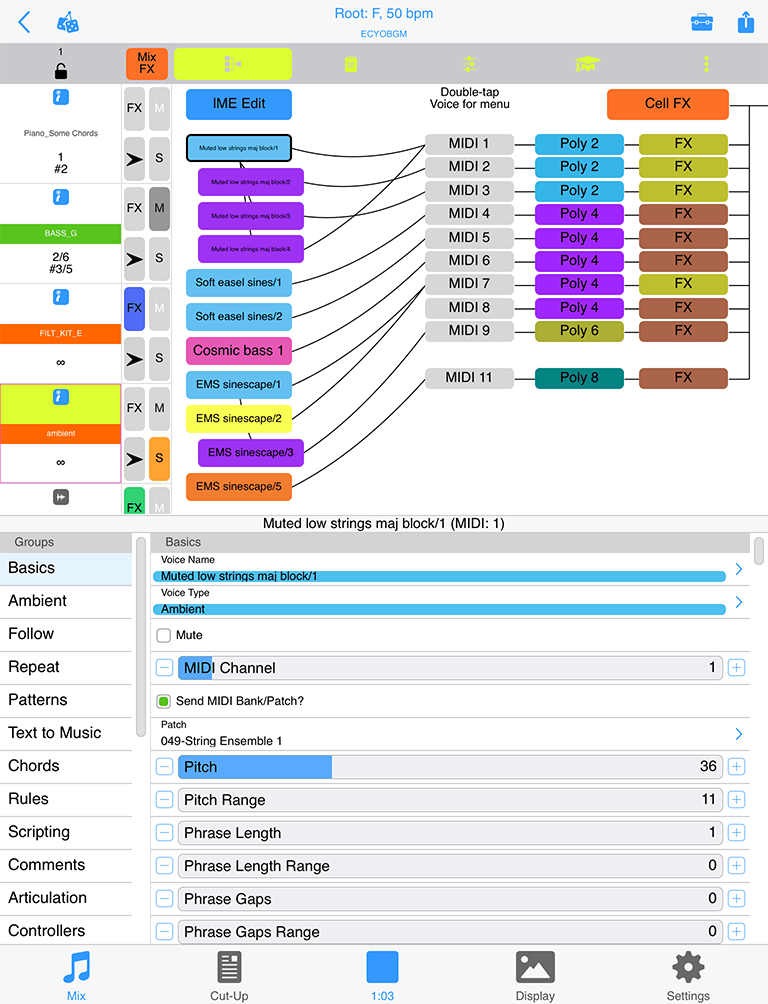
Mix Edit Mode: UI Overview

See: 'Free Mode' & Limitations
See the Video: Wotja iOS: Quick Start (4m)
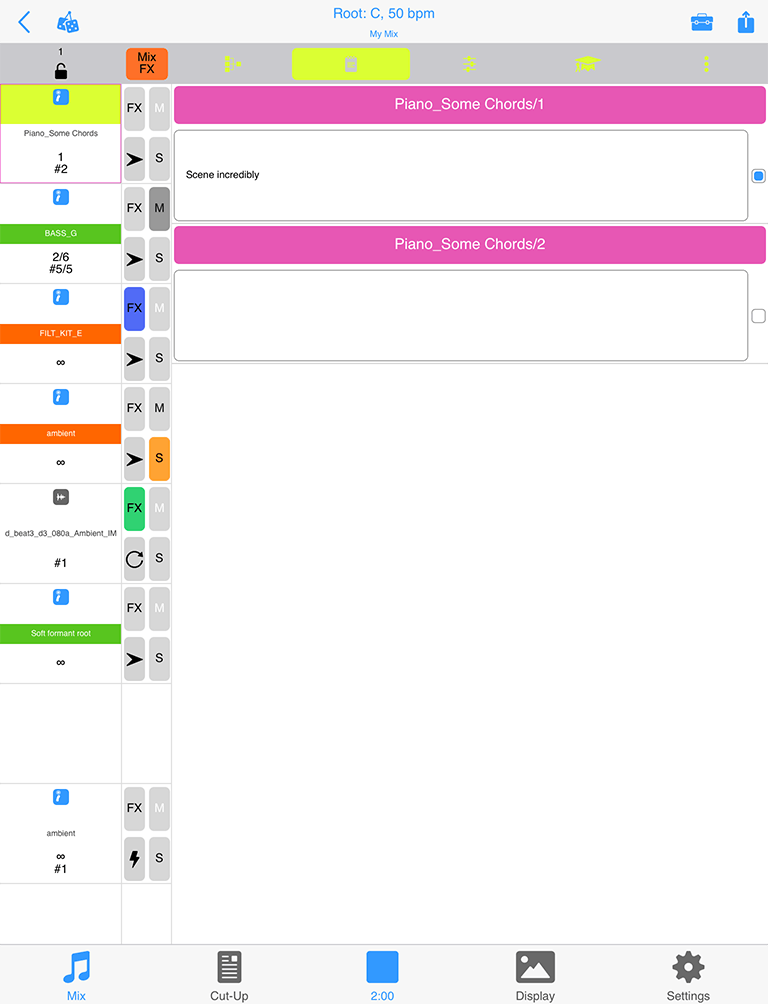
This section gives you a quick overview of the interface related to creation of Wotja mixes in the Mix Mode, accessed via the bottom Mix Tab.
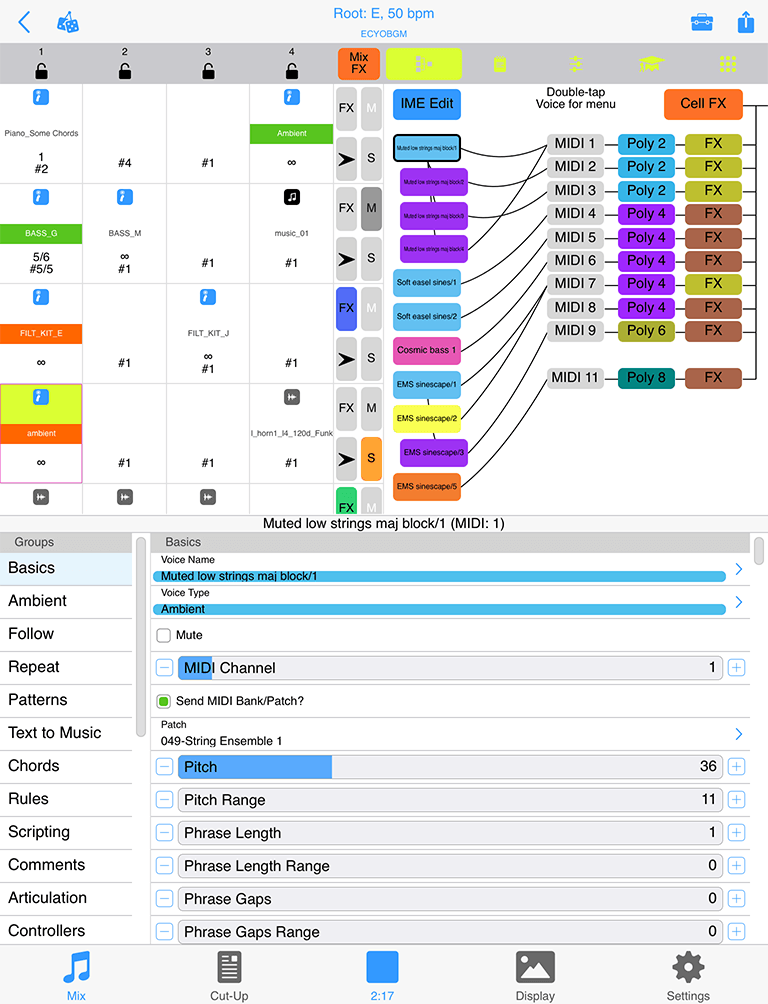
The Mix Mode has the most involved UI in Wotja X as it concerns the mixing and editing of generative music.
Right Side Display

Use the top toolbar 4 way segment control to show either the Network, TTM, Mixer or Rules data in the Wotja mix file.
- Network Panel
- TTM Panel
- Mixer Panels
- Rules Panel
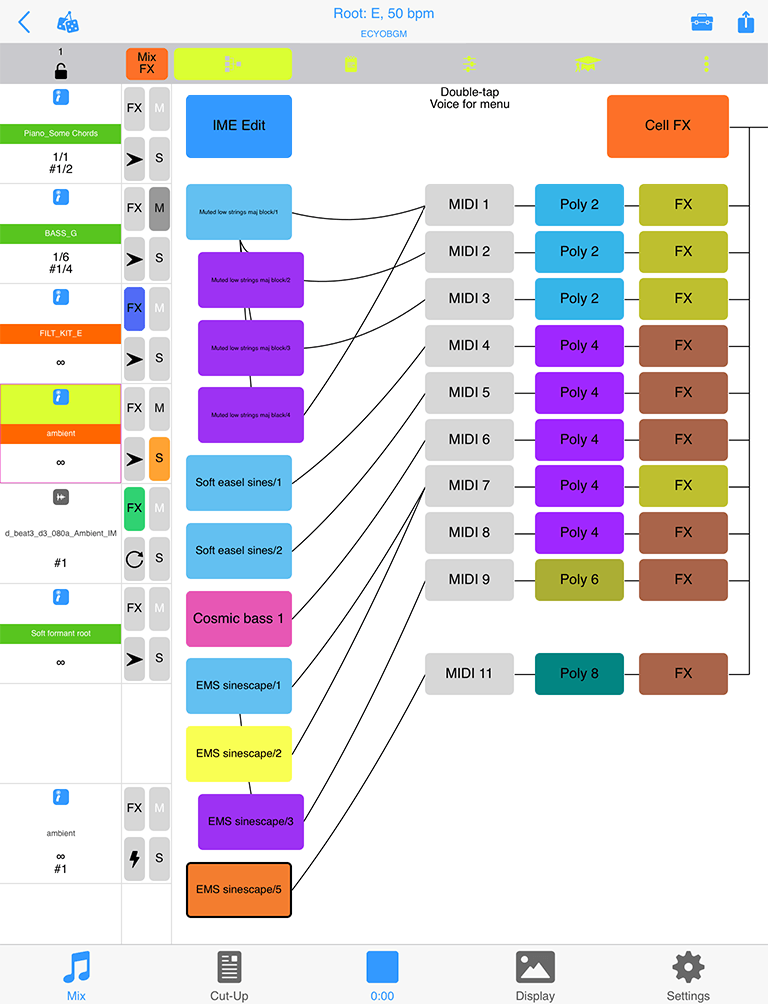
Left Side Display - One Cell/One Column/Grid

Use the top toolbar button to right of the Panel Display segment control above for a pop-up menu to select between Multi Column, Single Column or Single Cell display modes.
See the Central Area of the table below for detailed information on the Wotja Content Cells.
| UI Item | Description |
Menu Bar |
|
 Save/Back to Documents Save/Back to Documents |
Save / Back to Documents See: 'Free Mode' & Limitations Displays the Save Changes popup (see below) before exiting to the Documents Screen.
|
 Randomize Mix Randomize Mix |
|
 Toolbox |
See: 'Free Mode' & Limitations Tap the Toolbox button to pop up a menu where you can select from a number of useful actions. The button will take on a fuschia colour when you have selected a sticky action. Tap the button again to turn off sticky behaviour.
|
 Action Action |
See: 'Free Mode' & Limitations
|
Status Bar |
|
 Root/Tempo Root/Tempo |
Tap on this indicator to go straight to the corresponding "Mix" controls in the Rules Panel. |
Top Toolbar |
|
 Column Lock Column Lock |
Tap on this button to lock a column to force the play of all cells in that column; tap again to unlock it. Locking of a column only has effect on cells for a Track with Track Rule of type "Sequence" and where cells are not looped (i.e. no orange band). In single column view, the column number shown at the top is that of the selected Cell. |
 Mix FX Mix FX |
This button indicates if there is any Mix level FX applied. When there is no FX applied it is a dull blue colour. Tap the button to go the the ISE FX Network Editor where you can create or edit a FX network. |
 TTM TTM |
TTM Panel: For a selected Cell that contains generative content the right hand panel shows a TTM text field for every voice in a cell. Only Fixed Pattern voices (pink) can play TTM, and the Enable toggle will change a voice to that when turned on. |
 Track Mixer (Default) Track Mixer (Default) Voice Mixer Voice Mixer |
Mixer Panel: Once in this panel, tap the button again for a pop-up menu where you can choose between seeing the Voice Mixer and Track Mixer panels.
|
 Cell Rules Cell Rules |
Cell Rules Panel: Right hand panel shows the paramater values for the selected Cell that determine things such as how long it will play for. |
 Network Network |
Network Panel: For a selected Cell that contains generative content the right hand panel shows the cell's generator network. Tap on the buttons in the network to have quick access to the relevant Voice parameters for the Intermorphic Music Engine (IME), right through to accessing the Intermorphic Synth Engine (ISE) to carry out any sound design you wish to do. |
| Mix Display Mode button |
A mix always includes a "grid" of 12 tracks of 4 cells. You can populate or leave empty any cells you wish. This button, shown to the right of the panel selectors, has a pop-up menu allowing you to select one of three display modes for the grid:
|
Central Area - Content Cells |
|
 Content Cell Content Cell |
Content Cells are at the heart of Wotja. You can use the bottom toolbar right side "grid" icon to toggle the left hand Content Cell display to show either 1 column of Cells or 4 columns of Cells. There are 3 areas/parts of cell, see below. |
 Selected Selected Generative Generative  Audio Loop Audio Loop MIDI File MIDI File |
Selected Cell: When a Content Cell is selected the border of the cell takes on a fuschia colour and the top or bottom of the cell takes on a lime green background colour that marries up to the right side panel that has been selected to display. The top of a Content Cell also displays an icon depending on the kind of content in it:
|
Cell Status: Playing Playing Looping Looping |
The middle of a Content Cell displays the Cell Status band and within that is the name of the file in the Cell. The colour of this band indicates the following:
|
Cell Values: Playing Playing Stopped Stopped Infinite Infinite Missing Content Missing Content |
The bottom of a Content Cell shows the cell "Arrange" values, and these are presented differently depending on whether the mix is playing or stopped. The topmost values shown in blue are the Cell's Generative Bar values and the values below those in black or dark grey are the Cell's Cell Repeat values.
|
Central Area - Track Controls |
|
 Track FX Track FX |
Default - None: Tap this button to go into the ISE Network Editor where you can add Track FX. |
Track Rules: Sequence Sequence One Shot One Shot  Loop Loop |
Default - Sequence: Sequence: When the content in the Track's current cell has finished playing, the next Cell in the track will play (unless it has been forced to loop). One Shot: No Track Cell will play UNTIL it has been triggered (it will display the green "play marker" in the middle of the cell). Once triggered, any content will play through ONCE (like a sting) and then the cell will stop playing. Loop: No Track Cell will play UNLESS it is forced to loop - either by tap/hold on the cell or by setting the Loop toggle in this panel. Turn off looping the same way. Tip: When using the Toolbox menu "Randomize" menu functions only the item "Randomize Cell (sticky)" will randomize the Cell. Advanced Tip: Cells in Loop tracks containing Audio/MIDI content will play ONCE when the Column lock is first applied to a Column (if a cell is not already looping); cells containing generative content will be set to play for the length of the mix (∞). |
 Track Solo Button Track Solo Button |
Tap to solo the related Track. Gold tint means soloed, grey means not soloed. This button is in the Track Control grouping to the left of the sliders. |
 Track Mute Button Track Mute Button |
Tap to mute the related Track. Dark grey means soloed, grey means not soloed. This button is in the Track Control grouping to the left of the sliders. |
Central Area - Right Side Panel |
|
 Generator Network Generator Network |
What shows in this area depends on which panel you are in:
See in order:
|
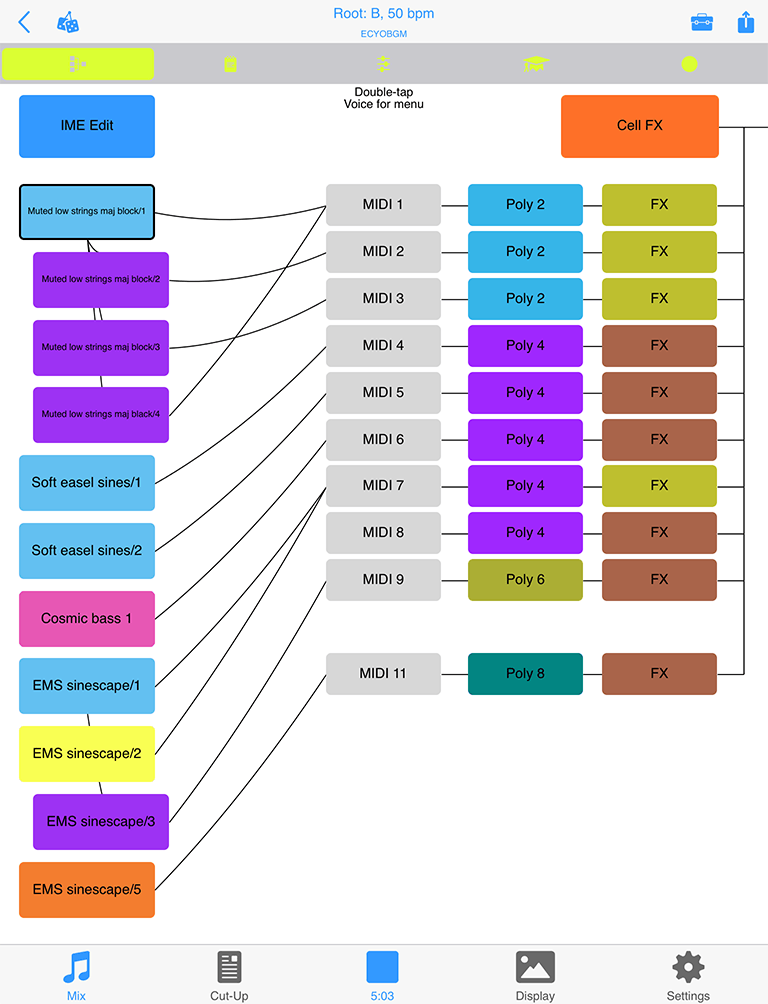
Mix Edit Mode: Panel - Network
See the Video: Wotja iOS: Quick Start (4m)
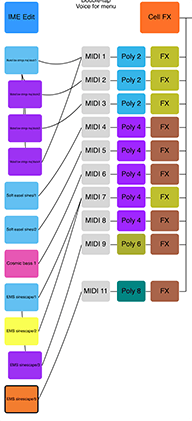
The right side "Network" panel is where you can marry IME voices (note generators) to MIDI channels, ISE synth sounds and FX. The buttons in the network and associated ISE network all provide quick links to the underlying paramaters and editors.
Tap the top Voices button for quick access to the IME parameter editors. Go to the Cell Rules panel to set Cell and Mix level settings such as Cell Rules and Mix Tempo.
Tap/hold on a voice and you can drag it up/down to change the voice order. If you drag from a Voice button to a MIDI channel box that will tell the system that the Voice will play through the defined MIDI channel. If a new voice is added to a piece, the voice won't be assigned to a specific MIDI channel; if you haven't yet hooked-up a Voice to a MIDI channel, the IME will decide on a free MIDI channel to hook-up the Voice to when it starts playing.
For full information on the Intermorphic Music Engine (IME) parameters refer to the IME User Guide.
For full information on the Intermorphic Sounds Engine (ISE) parameters refer to the ISE User Guide.
| UI Item | Description |
 IME Edit / Voices button IME Edit / Voices button |
Tip: See last item in the pop-up menu (below) for IME Edit panel show/hide option. 'IME Edit' button: - Tap on this IME Edit button (and/or right click in the Desktop version) and it will display the pop up menu below.
See also the Intermorphic Music Engine (IME) Guide for details on what the parameters do. |
 Piece FX Piece FX |
Tap set the piece level FX in the ISE FX editor. |
 Voice button Voice button |
Tap/hold on a Voice button (and/or right click in Desktop version) to get a Voice Action pop-up menu (see the IME Edit button menu above). Note: To Paste a voice (once copied) you must tap an existing voice and then select Paste. |
 MIDI channel MIDI channel |
The Voice "IME Patch" parameter (see Voices screen) defines which MIDI Patch command to send for each MIDI channel. The MIDI channel box is an indicator and not a button. However, you can tap/hold a voice button and drag it to a MIDI channel box. In general, you should only hook-up multiple Voices to the same MIDI channel if they all share the same Patch parameter. MIDI Channel 10 is reserved for the Drum instrument. Every voice with a Drum Patch, should generally be attached to MIDI Channel 10. |
 Synth button Synth button |
If the "ISE for Sounds & FX" toggle is checked in the Settings screen, then MIDI events are routed for each channel through an ISE Synth configuration defined by the associated Synth button, which by default will use ISE's built-in MIDI Wavetable synth (using the Patch defined by the Voice's Patch parameter). If you want to use a custom sound, click the Synth button to invoke the ISE Synth editor. |
| Track FX button |
The output from every Synth box can be passed through a custom FX Network. If you want to use an FX, click the FX button to invoke the ISE FX editor. |
Mix Edit Mode: Panel - TTM
See the Video: Wotja iOS: Quick Start (4m)
The "Text to Music" (TTM) panel is where you see which TTM players are active and it provides a quick route to adding text into them.
Tap on a coloured voice button to take you to that Voice's parameters in the Voice Tab.
Tap on the Text area to go into the Text Editor screen (see table below) where you can add your text .
You can use any text , and in can be in any language. In general it takes 2 characters to generate a note .
| UI Item | Description |
TTM Panel |
|
 Voice button Voice button |
Tap to take you to the parameters for this voice in the Voices tab. In that screen tap the LHS "Text Pattern" item to scroll to all the TTM related parameters. |
 Text Text |
This is your TTM text. Tap this to go to the Text Editor screen below. |
 Enable toggle Enable toggle |
Turn this on to enable the TTM voice, meaning your text will be used to generate a pattern. If the voice type is not already Fixed Pattern turning on this toggle on will change it to one. The pattern generated by your text will then overide any pattern that may already be in the Fixed Pattern voice. |
Text Editor Screen
Accessed via the Mix Mode > TTM Panel > Voice TTM button or via the Mix Mode > Network Panel > Voices Button > Text to Music > Text parameter, this is the screen where you enter your TTM text .
Tip: Using the Randomise button in this screen is a quick and easy way to create some cut-up text!
| UI Item | Description |
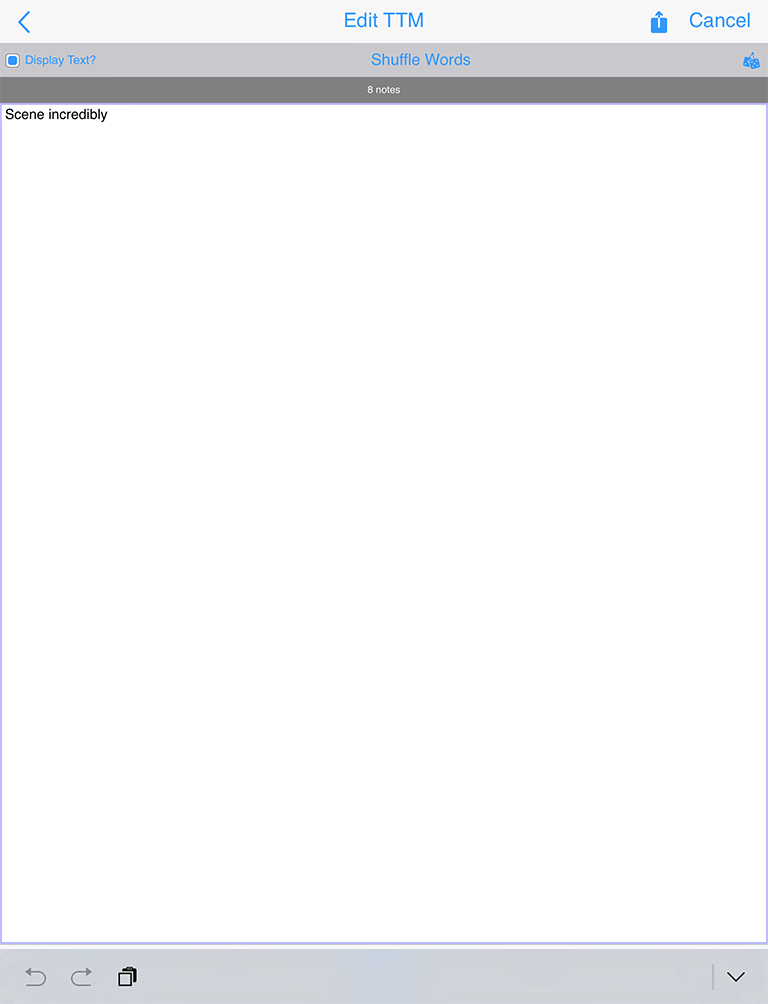 Text Editor Text Editor(click image for large) |
Where you enter your TTM text . |
 Action Action |
Popup Menu: |
 Display Text? Display Text? |
When this toggle is on and you use in a TTM voice, your TTM text will show in full screen mode. |
 Randomise Option Randomise Option |
Tap the button for a Popup menu where you can set what happens when you press the Randomise button (dice icon to the right of this button).
Popup Menu: |
 Randomise Button Randomise Button |
Carries out the action set in Randomise Option. |
 Notes Notes |
Tells you the number of notes your text generates. |
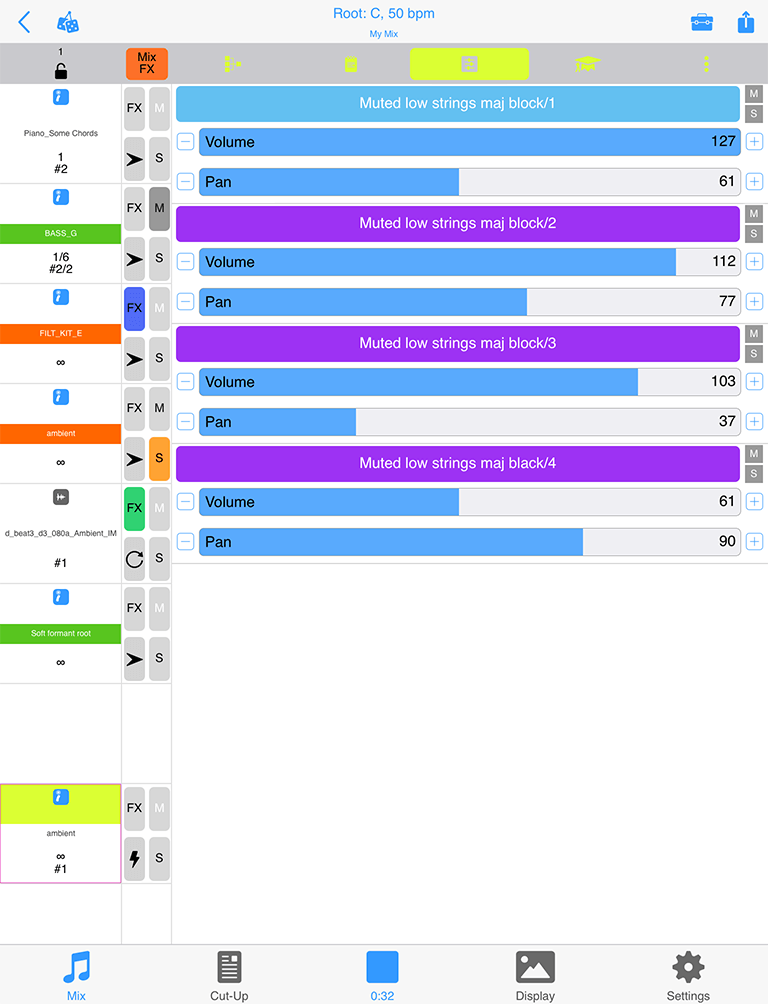
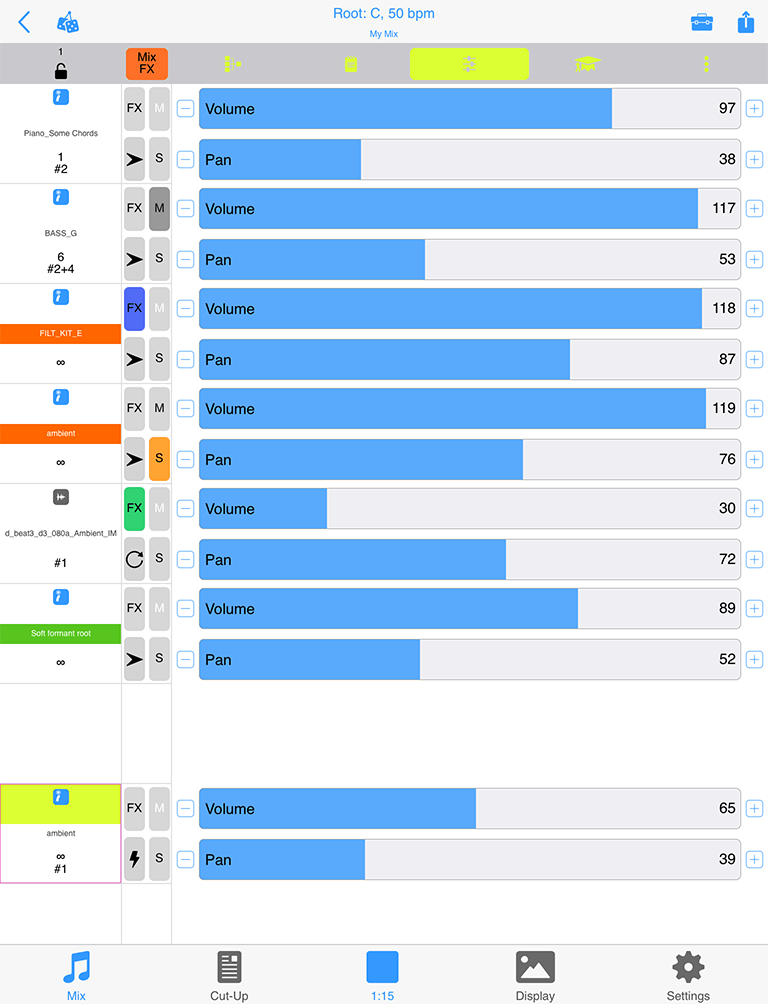
Mix Edit Mode: Panel - Voice Mixer
See the Video: Wotja iOS: Quick Start (4m)
Tip: To swap between Voice Mixer and Track Mixer panels, first select this segment in the top toolbar. Tap the segment again for a pop-up menu which allows you to change between them.
The right side "Voice Mixer" panel is where you can easily change the volume and pan balance of the Voices (generators) used within the cell.
Tip: To mix tracks against each other use the Track Mixer panel.
Tap on a slider to change the volume or pan.
Tap the Mute or Solo button to mute or solo the Voice. These buttons do not at present change colour like those in the Track Mix panel.
| UI Item | Description |
Voice Mix Panel |
|
 Voice button Voice button |
Tap to take you to the Voice in the Voices tab so that you can edit its composition parameters. |
 Volume Slider Volume Slider |
Tap to change the volume for the related Voice. Tip: This slider changes the volume value for the MIDI channel that this Voice is on. You may have multiple Voices all on one MIDI channel. In that instance, try changing the Voice's Velocity parameters instead. |
 Pan Slider Pan Slider |
Tap to change the pan position for the related Voice. Tip: This slider changes the pan value for the MIDI channel that this Voice is on. You may have multiple Voices all on one MIDI channel. |
 Voice Mute/Solo Buttons Voice Mute/Solo Buttons |
Tap to mute or solo the related Voice. Tip: The Voice button will turn light grey when it is muted. These buttons do not at present change colour like those in the Track Mix panel. |
Mix Edit Mode: Panel - Track Mixer
See the Video: Wotja iOS: Quick Start (4m)
Tip: To swap between Track Mixer and Voice Mixer panels, first select this segment in the top toolbar. Tap the segment again for a pop-up menu which allows you to change between them.
The right side "Track Mix" panel is where you can easily change the volume and pan balance of each of the tracks used in the mix.
Tip: To mix the internals of a cell use the Voice Mix panel.
Tap on a slider to change the volume or pan.
Tap the Mute or Solo button to mute or solo the Voice. These buttons change colour to indicate their status.
| UI Item | Description |
Track Mix Panel |
|
| Volume Slider |
Tap to change the volume for the related Track. |
| Pan Slider |
Tap to change the pan position for the related Track. |
Mix Edit Mode: Panel - Cell & Mix Rules

See the Video: Wotja iOS: Quick Start (4m)
The right side "Rules" panel is where, amongst other things, you can easily set the parameters that define how a Cell will play, as well as the rules used for the Piece in that Cell AND some general values that apply to the whole Mix (such as Tempo, Root, Ramp Up/Down as well as Playlist Duration settings, all shown at the bottom of the panel).
Tip: The values of some of these cell settings are shown overlaid on the relevant Cell.
Tip: Access the "Mix" section controls by tapping on the Root/Tempo indicator in the top Status bar.
Mix section: The Mix Tempo, Mix Root and Ramp Up/Down settings apply to both a mix and/or that mix in a Playlist, but the Playlist Duration/Playlist Duration Range/Playlist Ramp Down are specific to that mix only in Playlists.
Important: We do not support Mix level rules that override those in all cells, but it is something we may consider later.
Noatikl Tip: When exporting a piece for use as a template, it is best to use a maximum piece length (32,000 seconds).
Tip: If you are going to be making your mix or piece available for others to use, you may well wish to include your own copyright statement for each piece in the mix. Each voice within the piece can also have its own copyright statement.
For full information on the Intermorphic Music Engine (IME) parameters refer to the IME User Guide.
| UI Item | Description |
Generative Cell |
|
| Gen Bars | Default: ∞ [0 - 1000] - The minimum number of bars for which a cell will play generative content. Special Value: If this value is set far left to ∞ [0] then once play in a Track reaches such a cell the generative content in that cell will continue to play either for as long as the mix plays or until you manually select another cell in that Track to play. This value is the first of a pair of numbers shown in blue in the top line of text at the bottom of the cell. The value in brackets next to the Gen Bars value shows what this represents in terms of h:m:s and takes into account the mix tempo. |
| Gen Bars Range | Default: 0 [0 - 1000] - A value that is added to the Gen Bars value to define the maximum number of bar for which a cell will play generative content.
This value is the second of a pair of numbers shown in blue in the top line of text at the bottom of the cell. If the first value (above) is ∞ then this value is not shown. |
| Harmonize with Me | Default - ON: This determines if Wotja needs to take the notes played by this Cell into account when composing/playing other Cells. |
| Harmonize with Others | Default - ON: This determines if Wotja needs to take the notes played by other Cells into account when composing/playing notes for this Cell. |
Generative Piece Rules |
|
| Scale Rules | Default - Default Rule: When the cell is playing any active rule element will flash; the colour is that of the Voicetype of the playing voice. To edit or change the Piece Level Scale Rule (which can be overridden at Voice level), tap on it to go to the Rule Editor screen. For information on Scale Rules refer to IME Rule Object. For information on Piece Level rules refer to IME Piece Rules. |
| Harmony Rules | Default - Default Rule: When the cell is playing any active rule element will flash; the colour is that of the Voicetype of the playing voice. To edit or change the Piece Level Harmony Rule (which can be overridden at Voice level), tap on it to go to the Rule Editor screen. For information on Harmony Rules refer to IME Rule Object. For information on Piece Level rules refer to IME Piece Rules. |
| Next Note Rules | Default - Default Rule: When the cell is playing any active rule element will flash; the colour is that of the Voicetype of the playing voice. To edit or change the Piece Level Next Note Rule (which can be overridden at Voice level), tap on it to go to the Rule Editor screen. For information on Next Note Rules refer to IME Rule Object. For information on Piece Level rules refer to IME Piece Rules. |
Scripting |
|
| Script | Show the first line of any Piece (Cell) level script. Tap on it for the Wotja Script Editor. |
Generative Piece Info |
|
| Title | Displays the Title of the Piece/Template, if it is defined. For information on Piece Title refer to IME File. |
| Author | Displays the Author of the Piece/Template, if it is defined. For information on Piece Author refer to IME File. |
| Notes | Displays any Notes in the Notes field the Piece/Template, if defined. For information on Piece Notes refer to IME File. |
Cell Rules |
|
| Cell Repeats | Default - 1: The minimum base value for the number of times a cell will repeat after it has played through once and to which the range value (below) is added. For a generative template each bar counts as one repeat; for audio or MIDI content this is the length of the content rounded up to the end of a bar). Note: If the cell contains generative content and the Generative Bar Min is value is set to ∞ then this setting takes no effect as the cell never repeats! This value is the first of a pair of numbers shown in black in the bottom line of text at the bottom of the cell. |
| Cell Repeats Range | Default - 0: Sets the range that applies to the above base value. This value is the second of a pair of numbers shown in black in the bottom line of text at the bottom of the cell. |
| Loop (Toggle) | Default - Off: Turn this on to force the Cell to loop continuously. Only once Cell per Track can be looped. Turning on Looping for another Cell will turn off Looping for this Cell. |
| Cell Root Offset: Mix Root + Semitones | Default - Template Root: Choose the Root you want to apply to the Cell. Its value is a Semitone offset from the Mix Root. |
Track Rule |
|
| Sequence/One Shot/Loop | Default - Sequence: Sequence: When the content in the Track's current cell has finished playing, the next Cell in the track will play (unless it has been forced to loop). One Shot: No Track Cell will play UNTIL it has been triggered (it will display the green "play marker" in the middle of the cell). Once triggered, any content will play through ONCE (like a sting) and then the cell will stop playing. Loop: No Track Cell will play UNLESS it is forced to loop - either by tap/hold on the cell or by setting the LoopToolbox menu "Randomize" menu functions only the item "Randomize Cell (sticky)" will randomize the Cell. Advanced Tip: Cells in Loop tracks containing Audio/MIDI content will play ONCE when the Column lock is first applied to a Column (if a cell is not already looping); cells containing generative content will be set to play for the length of the mix (∞). |
File Info |
|
| Name | File name: This displays the name of the audio/MIDI file or original template used in the Cell. |
| Path | Pak Name: This displays the name of the zip file that includes the template. |
| Duration | Content length (secs): This displays the play length of the content in the cell. |
Mix |
|
| Mix Root: | Random root is chosen for an automatic mix or from the template if created manually: Choose the Root you want to apply to the whole Mix. |
| Tempo: | Default - Template Tempo: Choose the Root you want to apply to the Cell. Its value is a Semitone offset from the Mix Root. |
| Ramp Up: Seconds | 0-20: This applies when the mix starts to play (also in a Playlist). |
| Playlist Duration: Seconds | 10-7200: This is how long the mix will play for in a Playlist (overridden by Music Play Time). Double tap for a pop-up menu where you can edit the value via on-screen keyboard. |
| Playlist Duration Range: Seconds | 0-7200: A range value added to the Playlist Duration value (overridden by Music Play Time). Double tap for a pop-up menu where you can edit the value via on-screen keyboard. |
| Ramp Down: Seconds | 0-20: This applies when the mix stops playing in a Playlist. |
Mix Edit Mode: ParamParameter Editor - Voices
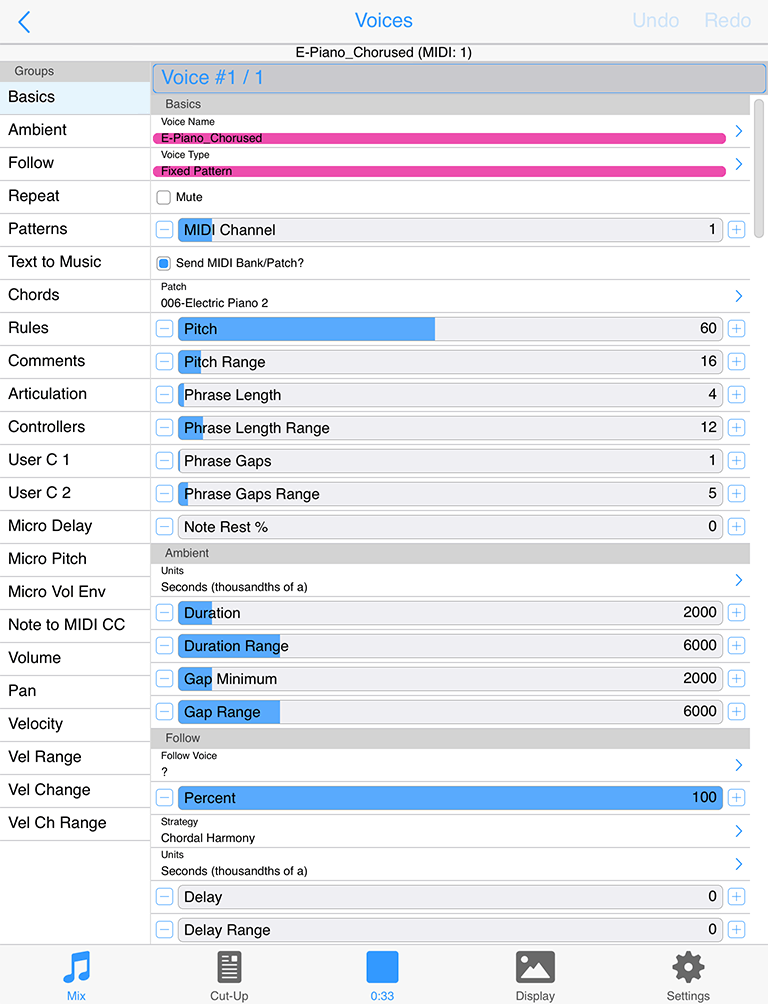
The Voice Editor screen is where you can fullscreen edit all the parameter values for each of the voices in the piece in the cell. You get to it from the Network panel by tapping on a Voice button (or IME Edit button) and selecting Edit from the pop-up menu.
Simply select the Parameter Group on the left hand side, and then edit the parameters on the right.
For full information on the Intermorphic Music Engine (IME) parameters refer to the IME User Guide.
| UI Item | Description |
| Undo/Redo | Undo or Redo your last parameter change. |
Central area |
|
 Voice Selector Bar Voice Selector Bar |
The Voice selector bar shows the number of voices in the piece (in the selected cell). Tap in the left or right side of this bar to move to another. |
 Parameter Group List Parameter Group List |
Tap the item you are interested in the left hand Parameter Group list for the right panel to scroll to that section. Tip: Tap "Basics" to scroll the Parameter Values panel to the top so you can see the Voice name. For full information on the Intermorphic Music Engine (IME) parameters refer to the IME User Guide. |
 Selected Parameter Group Selected Parameter Group |
The selected Parameter Group. |
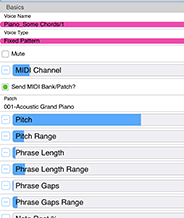 Parameter Values Panel Parameter Values Panel |
The Parameter Values panel is where you change the values for parameters in the group. Swipe up / down in this panel to scroll up or down. For full information on the Intermorphic Music Engine (IME) parameters refer to the IME User Guide. |
Mix Edit Mode: ParamParameter Editor - Rule
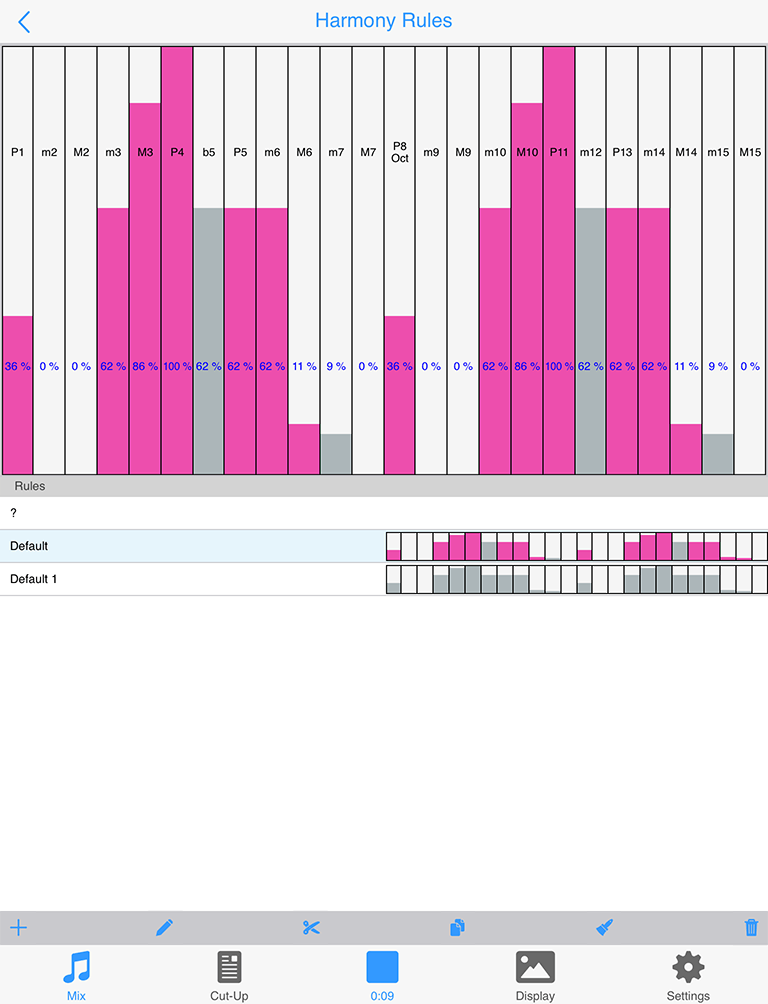
This view is where you select and (real-time) edit the Rules used in your voice or piece - be they Scale, Harmony, Next Note or Rhythm rules.
| UI Item | Description |
Top area |
|
 Rule Element Rule Element |
This control lets you change the rule elements. Tap on a rule element to change its value. The composition engine accomodates all rule changes in real-time - which can be a lot of fun! So that you can tell when a voice using the currently selected rule composes using it, it flashes the colour of the voice type used by that voice. This is primarily to remind you that other voices rely on that rule, so if you are going to change it then the way other voices compose may change, too. It can be useful to have the same rule used by all voices, but if you want to, then each voice can have its own rule! For full information on the Intermorphic Music Engine (IME) parameters refer to the IME User Guide. |
List area |
|
 Rules List Rules List |
Below the Rule Edit area is a scrollable list contains all of the defined rules. Tap a rule to select it so that you can edit it in the Rule Edit area above. |
Toolbar      |
The toolbar contains the Add Rule button, as well as a the Edit Rule Name, Cut, Copy and Paste buttons and the Delete button. When you select the Add Rule button you are presented with a set of included default rules. For Scale rules these may include Major, Minor, Dorian, Hypodorian, Hypolydian, Hypomixolydian, Hypophyrgian, Lydian, Mixolydian, Pentatonic, Phrygian. |
Mix Edit Mode: ParamParameter Editor - Pattern
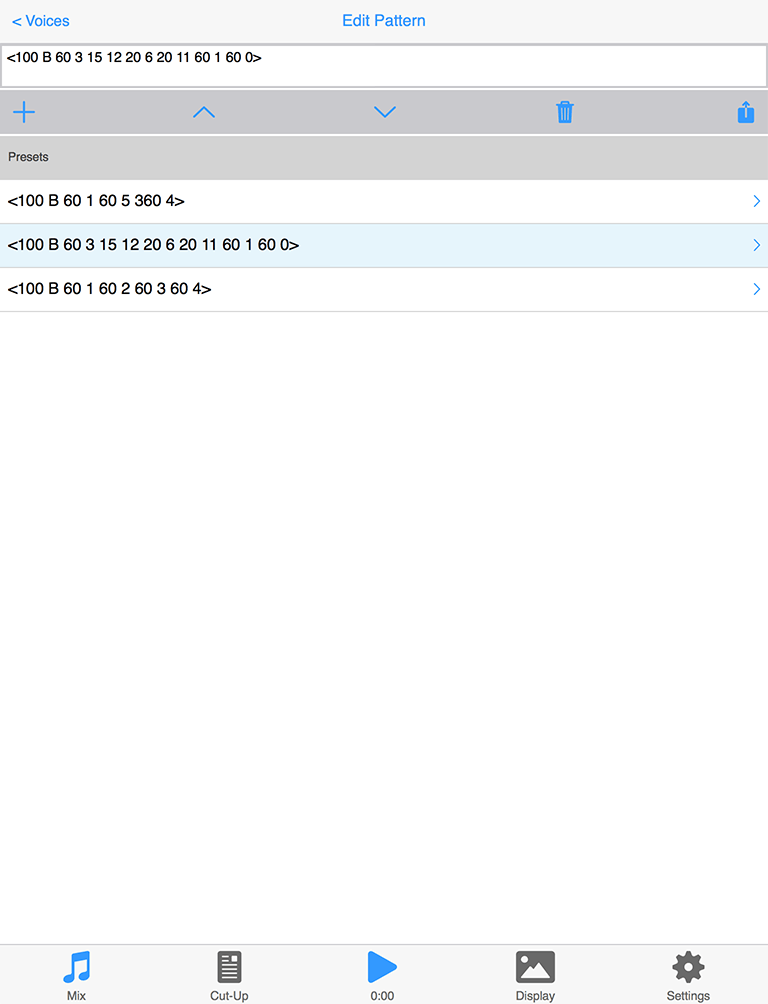
This view is where you edit all the Pattern parameters. Patterns are a little tricky to use because of limited string editing, so be aware. We suggest instead to use TTM Patterns.
| UI Item | Description |
Top area |
|
 Pattern Edit field Pattern Edit field |
Tap in the field to edit the IME Pattern or Sub-pattern. The IME Pattern Syntax can take a bit of getting used to and you will need to study it carefully if you want to use patterns. |
List area |
|
 Pattern List Pattern List |
Below the Pattern Edit field is is a scrollable list contains all of the defined patterns or sub-patterns. Tap a pattern to select it so that you can edit it in the Pattern Edit field above. |
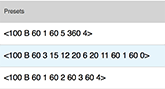
Toolbar     |
The toolbar contains the Add Pattern button, as well as a the Up and Down buttons to move patterns up and down, the Delete pattern button and the Presets button. Select the Presets button display a list of preset included patterns to choose from. IMPORTANT: The pattern you select in the presets list OVERWRITES your current selected pattern. Tip: Patterns are a way that can be used to create hidden structure in a piece. Set up a voice to be of Voice Type Pattern, set its volume to be zero (e.g. in the Blend view), but do not mute it (or it will not count in terms of composition). Then, follow that Fixed Pattern voice with another voice. Set up the following voice with Chords Strategy set to Chordal Harmony and you will never hear the pattern but it will be used as an invisible skeleton around which to compose! If you want to hear the pattern, set Follows Strategy to Semitone Shift. |
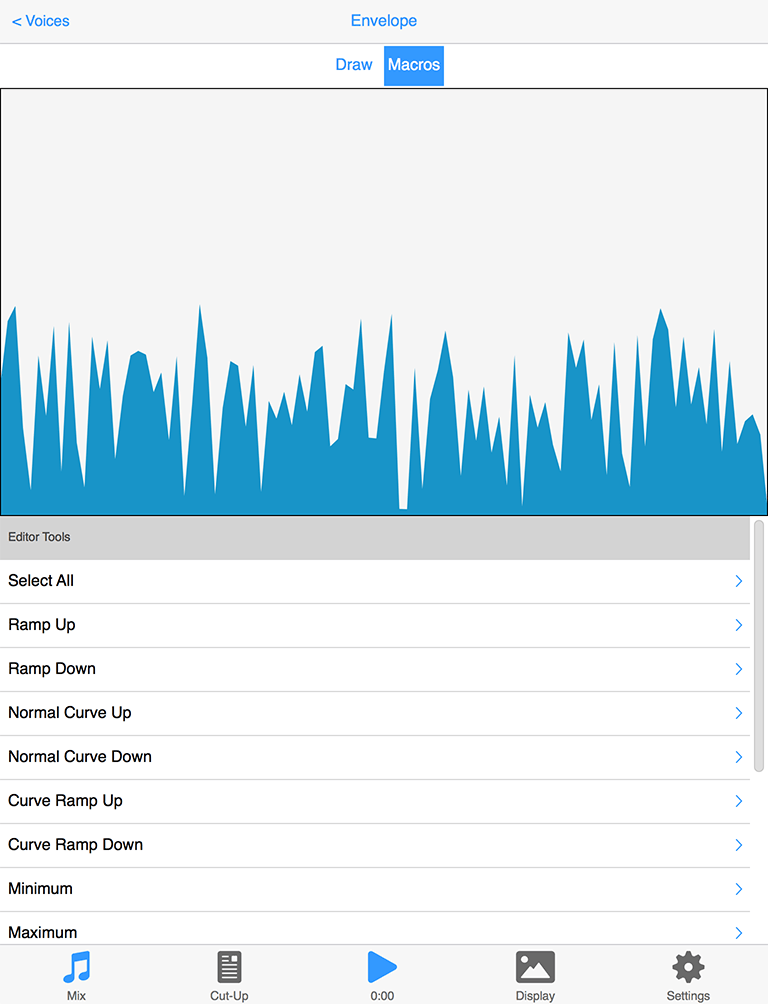
Mix Edit Mode: ParamParameter Editor - Envelope
Voice Envelopes are supported for the following parameters:
- Volume
- Pan
- Velocity
- Velocity Range
- Velocity Change
- Velocity Change Range
Envelopes work in the same way for all of these. This view is where you edit the Voice Envelopes.
Each envelope is a collection of up to 100 data points. A piece starts with the value at the left side of the envelope, and as it progresses, eventually ends up with the value from the far right of the envelope.
| UI Item | Description |
 Envelope Mode Envelope Mode |
Draw: Select this if yoi want to draw direct on to the envelope with your finger to change the values. Macro: Select this to use one of the various macro envelope editing tools. |
 Envelope Editor Envelope Editor |
|
Cut-Up Mode: UI Overview

See: 'Free Mode' & Limitations
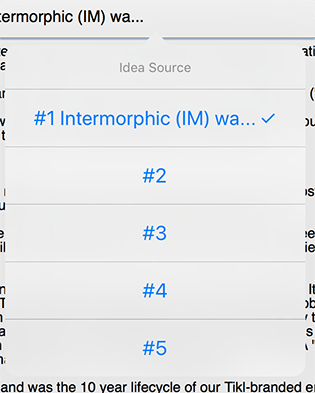
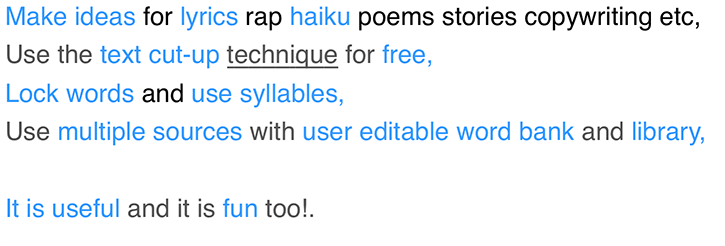
The powerful "cut-up technique" allows you to quickly generate ("Create") random word associations ("Cut-up") from a pool of words. This pool can include words from up to 5 user entered text fields ("Sources"), a user word library ("Word Library"), the customisable Wotja Word Bank ("Word Bank") and a non-editable Wotja Word Database ("Word Database").
You can lock down ("Lock") any words you want or, for just a selected word, choose one of the alternative cut-up words presented. You can use Rules ("Rules") to constrain your cut-up by lines, words and syllables.
Keep iterating until you find the interesting, inspiring or serendipitous combinations of words you are looking for. Save the the best Cut-ups ("Saved") and then use in real-world lyrics, poems, haikus, tweets etc.
For your cut-up you get to choose how many lines and how many words per line you want in it and whether you want Wotja to attempt End of Line (EOL) rhyming.
Tip: You can also also quickly generate cut-up in the Text Editor screen.
In Wotja for macOS there are 3 main panels in the display.

In Wotja for iOS these are selected by the control at the top (shown above):
- Sources: - Where you input and store all the text you want to be used as a source for your cut-up. The sources are saved in the your Wotja file and you can have up to 5 of them.
- Create: - Where you create your cut-ups. The created cut-up, locks and associated Rules are saved in your Wotja file.
- Saved: - Where you can see all the cut-ups you have chosen to save. These cut-ups are saved in your Wotja file.
Important: We respect copyright and strongly encourage you to do the same. That means if you use Wotja to come up with a lyric you like, make sure that it does not infringe the copyright of any of your source material. Wotja is pretty good at creating random "cut-ups", but it is just a tool for you to use to generate ideas. It is ultimately your responsibility to make sure you are not infringing anyone elses copyright.
Cut-Up Mode: Sources
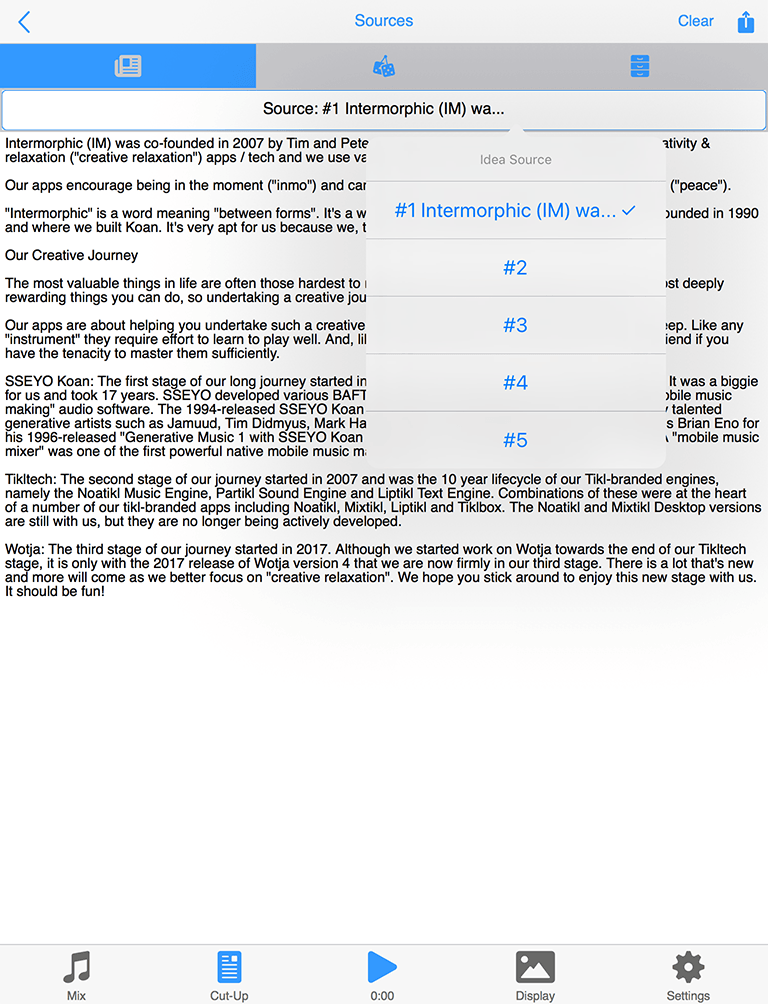
The Sources screen is the first of the three Cut-Up related screens.
It is where you input and store all the text you want to be used as a source for your cut-up. The sources are saved in the your Wotja file and you can have up to 5 of them.
Each source field is plain text only and you can type the data in directly, or paste-in some text from the clipboard.
macOS: There are also various other options you can use, which are on a pop-up menu that you can get at either by either right clicking or control clicking.
The Sources text boxes are all editable, which means you can move words around by cutting and pasting, or even edit or manually add in new words.
Tip 1: The more interesting the source material you use, the more interesting the cut-up suggestions generated. You can think of your favourite source materials like spices or ingredients, and then build up a collection of your favourites to add when you want. You can then add as little or as much as you like!
Tip 2: Why not try using text from some current news item as a Source - that way you can make sure you use words that are current, and some interesting themes can seemingly come out of nothing!
Tip 3: The more words there are in your Sources the more options for cut-ups.
Tip 4: To use the "Sources Only" cut-up mode requires that you have at least one source defined.
| UI Item | Description / Menu Items |
| Action |
Popup Action menu.
|
 Text Area Text Area |
This text area displays your source. It supports standard iOS text copy/paste etc controls. There is no formatting of text in a source. Wotja for macOS: In Wotja for macOS you can access a pop-up context sensitive menu by either right clicking (Windows) or right clicking/control clicking on one of the text fields in the Sources area, or a word in this area. Right/Ctrl click on a word NB: You can click on a word, or, specifically in respect of the search option, select (highlight) single or multiple words.
Click on the background
|
 Page Control Page Control |
Either tap a dot or swipe the screen left or right to move between sources. |
Cut-Up Mode: Create
The Create screen is the second of the three Cut-Up related screens.
It is where Where you create your cut-ups. The created cut-up, locks and associated Rules are saved in your Wotja file.
Tapping a word will lock/unlock it (a locked word is shown in red and will not be changed when you press the Create Cut-up button).
| UI Item | Description / Menu Items |
| Action |
Popup Action menu.
|
 Save Save |
Saves this cut-up to Saved. If this is the first one you save you see no pop-up. If you already have a saved cut-up in Saved, you see a pop-up with two options:
|
 Edit Edit |
Select to be able to edit the text in the cut-up area as plain text e.g. perhaps to change a word or even add new words (in which case a suitable new matching Rule will be generated). When in Edit mode, click in a word to place the cursor and press the Esc key to see a drop list of words; or double click a word to select it (once selected if you wait a second and click/hold the word again you can drag it). Press "Done" when finished to revert back to standard cut-up screen behaviour where tapping a word will lock/unlock it. |
 Rules Rules |
This top left button shows you the rule being used to create your cut-ups. If the rule has a title you will see it here, otherwise you will see the rule syntax. Tap on the Rules button to go to the Rules List where you can select a rule. Tap on the Rules button to go to the Rules List where you can select a rule. |
 EOL (End of Line) toggle EOL (End of Line) toggle |
Setting determines whether Wotja attempts to rhyme the ends of lines with other lines. For true, random, cut-up, then you would leave this set to EOL - OFF. |
 Character Count Character Count |
Displays the number of characters in your cut-up (useful to know if you plan on tweeting your cut-up) and number of syllables in each line. |
 Text Area Text Area |
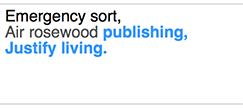
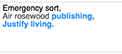
Lines are alternatedly coloured with black and dark grey so that if your text wraps you can easily see which line the words are in. Tap a word to lock or unlock it (it shows in red when locked). When you select a word (locked or unlocked) it also underlines it to show that it is the selected word (e.g. "inspiring" in the screenshot above). To select a word without changing its lock state tap on it and then drag away from it and release. Even though the word does not display an underline, it is now selected. |
 Word Alternatives Bar Word Alternatives Bar |
This is displayed just above the bottom toolbar. If you tap on one of the four alternative words (e.g. "creative" in the screenshot above) then that word will replace the selected word (e.g. "inspiring" in the screenshot above). To refresh the alternative words shown, either tap a blank part of the cut-up area or tap the Create Cut-up button. |
 Library Button Library Button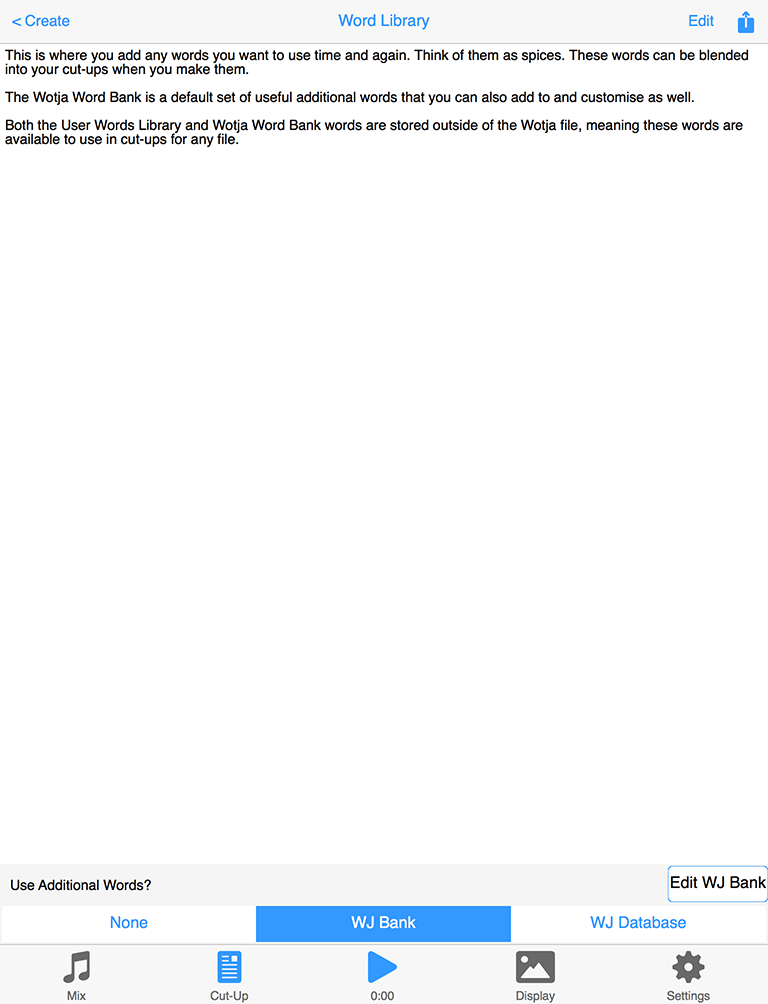 Library Screen Library Screen(click image for large) Library Screen(click image for large) 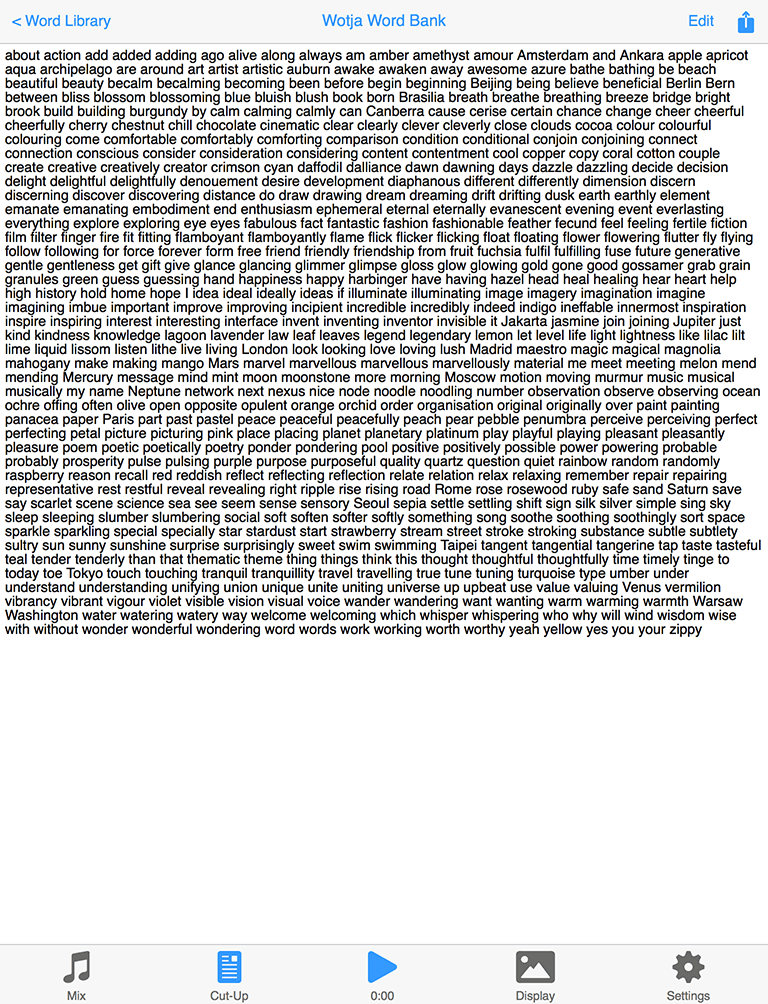 Wotja Word Bank Wotja Word Bank(click image for large) |
Located to the left of the Blend slider, tap this to view the User Word Library which where you can add your own favourite words ("spices") that you can mix with words from your sources. In the User Library click the Show button to view the Wotja Word Bank (containing over 650 selected words). Both are editable/customisable and operate as standard text fields. The User Word Library and Wotja Word Bank are both stored outside of the Wotja file, so these words are available to use in cut-ups for any file. |
 Blend Slider Blend Slider |
The position of the blend slider determines what proportion of words are selected from your Sources or from the User Library and/or Wotja Word Bank. Left means use words only from Sources, and right means use words only from your Word Library. Any where in between is a blend! |
 Cut-Up Mode Selector Cut-Up Mode Selector |
Tap the Mode Selector to choose how your cut-up is created. Word Lock: In this classic mode, words can be locked, and the non-locked words are changed using the active rule (including syllables), and are sourced from Sources text, User Library and any Word Bank data you might have defined. This mode is very useful for fine-tuning a cut-up. Sources Only: This new cut-up mode analyses the structure of the Sources text and lets you create cut-up with a more natural feel; in this mode the cut-up is created from Sources ONLY and it uses the active rule (ignoring syllables) but EOL rhyming and word locks are ignored. |
 Create Cut-up Button Create Cut-up Button |
This button looks like a dice and is located on the right of the tools panel. Provided you have first added some words to at least one of the Sources text boxes above (or you have some words in your User Library or the Wotja Word Bank toggle is on AND the Library slider is not hard over to the right) when you click this you'll see a Cut-up appear in the text area above it. Each time you click this button all non-locked words will be replaced by words selected at random from your word pool and/or Library/Word Bank. |
Rules List |
|
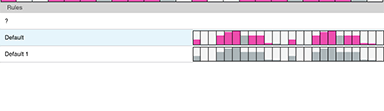
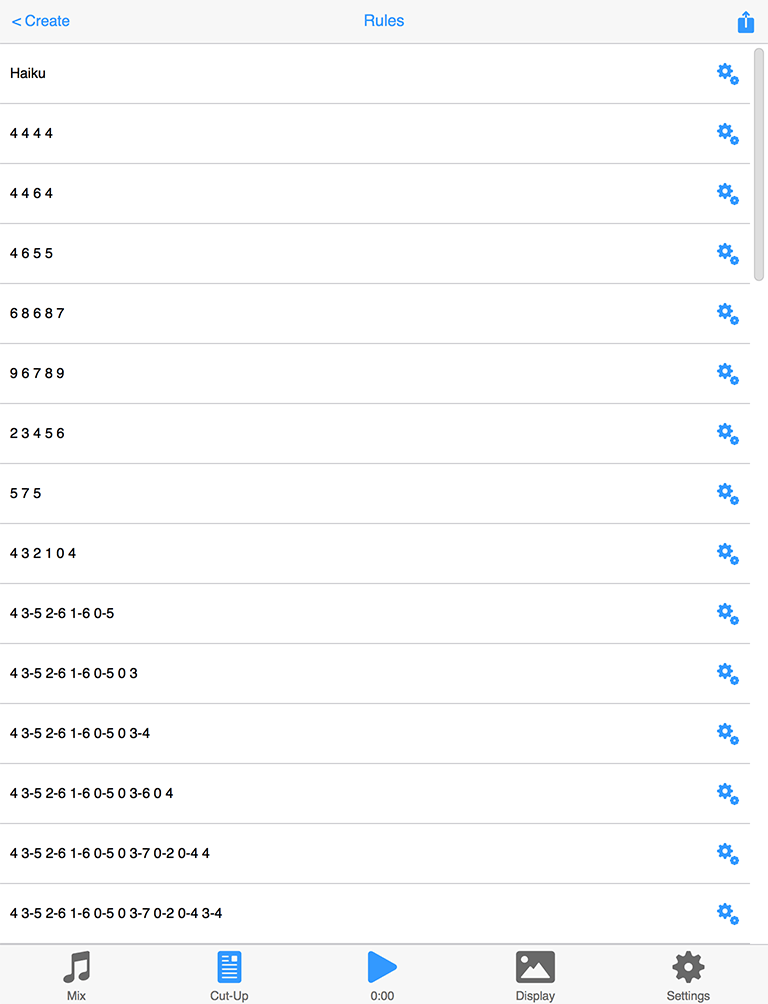 Rules List Rules List(click image for large) |
In the Rules List you will see the available Rules and can select the rule you want to have used for your cut-up. If there isn't one there you want to use then you can easily create and use any rule you want - see the Rule Editor. Tip: Rules are stored in a Wotja file. When you create a new cut-up then the Rules List is populated with the default rules. The cut-up uses only the rule you select and you can delete any of these rules you don't want to be used for cut-up. Edit:
Actions:
Rule List item:
|
Rule Editor |
|
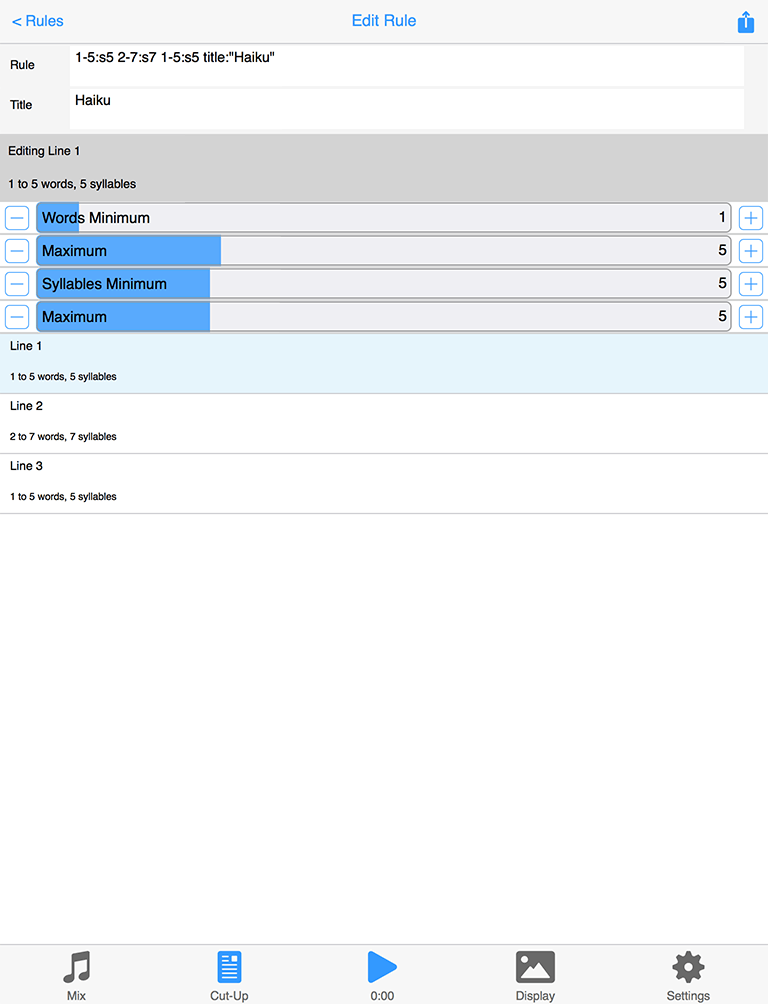 Rule Editor Rule Editor(click image for large) |
See: 'Free Mode' & Limitations The Rule Editor provides an easy, graphical way to create rules. If there isn't a rule you want to use in the Rules List, or you want to edit it, then you can do that easily. There are 3 ways to edit or create Rules. Either:
Editor Controls:
Rule SyntaxThe most basic Rule consists of a series of numbers. Each number stands for the number of words to put in a particular line of the cut-up. For example, the numbers "3 4 5 6" would represent four lines of cut-up as there are four numbers. The first line would have three words, the second would have four words, the third would have five words, and the fourth would have six words. There is a lot more you can do if you want to, and it then helps to understand the Rule syntax. Line Rule SyntaxTip: Items in [ ] are optional. LineWordsMin [- LineWordsMax[:SyllablesMin [-SyllablesMax]]] Composite SyntaxLineRule1 LineRule2 LineRule1 [title:"Name"] Using the above syntax it is easy to create a Haiku rule with 3 lines of words within a range and and fixed number of syllables of 5,7,5 for those lines. e.g.: 1-5:s5 2-7:s7 1-5:s5 title:"Haiku" |
Cut-Up Mode: Saved
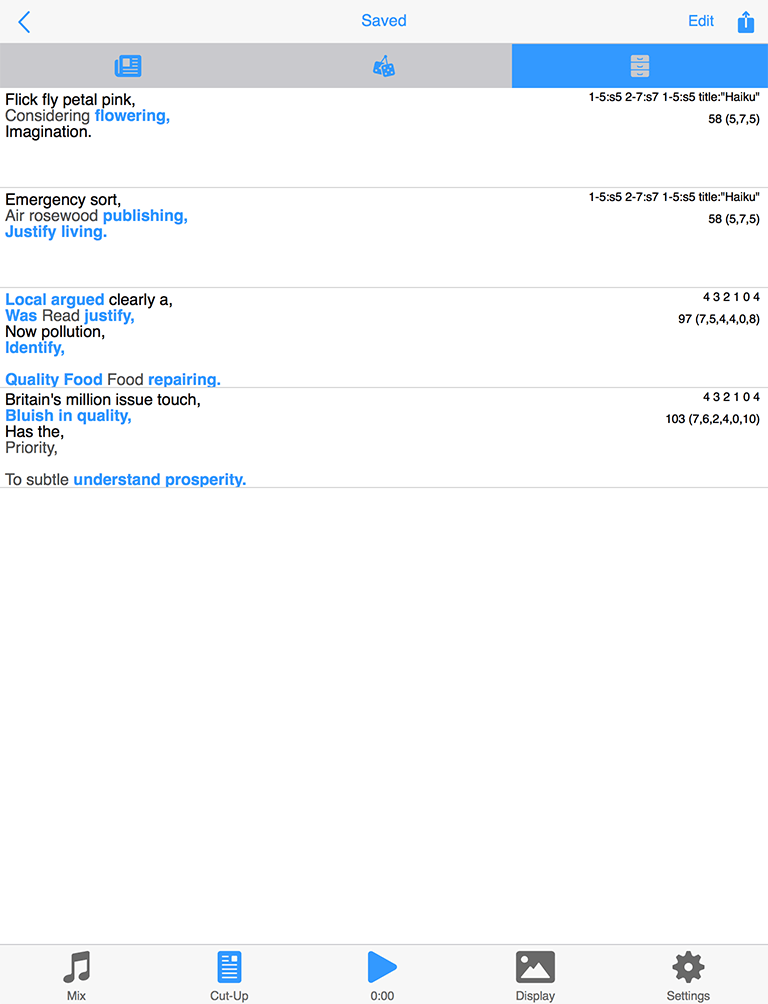
The Saved section is the third of the three Cut-Up related screens / sections.
It is where you can see all the cut-ups you have chosen to save. These cut-ups are saved in your Wotja file.
| UI Item | Description / Menu Items |
| Action |
Popup Action menu.
|
| Edit |
Popup menu.
|
 Saved Cut-up Saved Cut-up |
Tap a saved Cut-Up to select it. Export Saved Cut-Up: Right click a saved Cut-Up for a pop-up menu with options to copy it to the Clipboard or share it via standard Apple services. |
 Action Action  Edit Edit |
Add: Copy the current Cut-Up to the saved Cut-Ups. Replace: Replace the selected saved Cut-Up with the current Cut-Up. Up/Down: Use these buttons to change the order of saved Cut-Ups. Edit: Copy the selected saved Cut-Up to the Cut-up screen for editing. Delete: Delete the selected saved Cut-Up. Export All: Tap the right hand Actions button for a pop-up menu with options to copy all saved Cut-Ups to the Clipboard or share them via standard Apple services. |
 Cut-up Cut-up |
Edit saved cut-up: Tap on a saved cut-up and in the pop up message select OK to copy it to the Cut-up screen for editing. Delete saved cut-up: Swipe left on a cut-up and select Delete. Export one cut-up: Swipe left on a cut-up and select Export. |
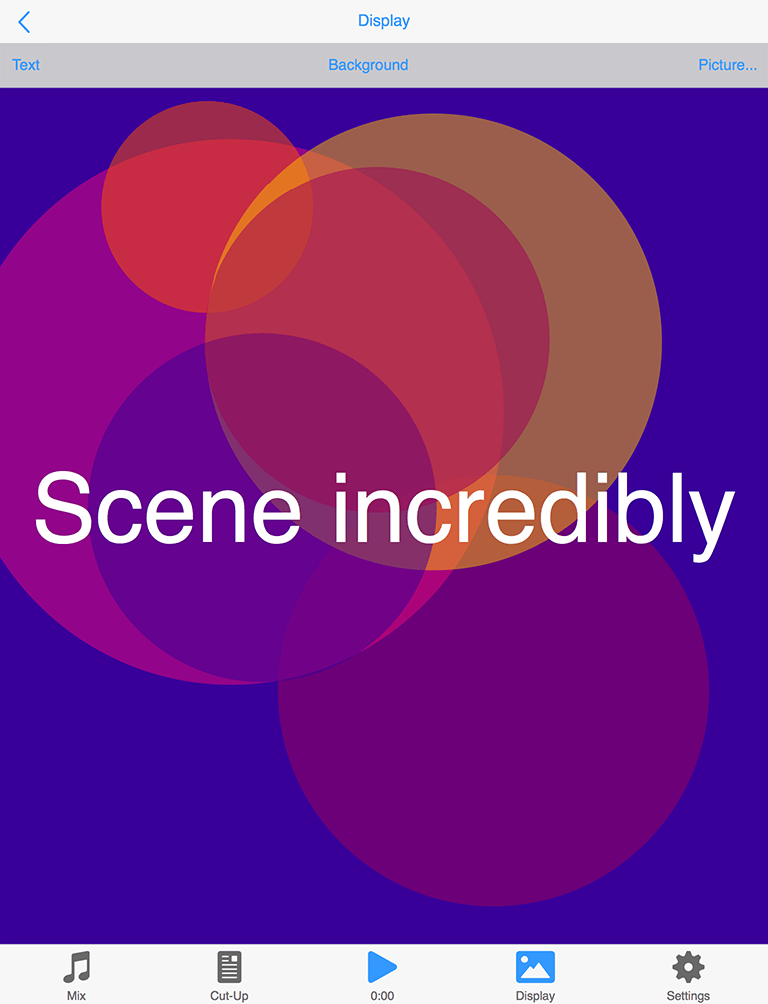
Display Mode
See the Video: Wotja iOS: Playlists (8m)
The Display Tab (also referred to as Display Screen) is where you access the screens that let you set up how your wotja looks, i.e. for Fullscreen display when someone loads it.
If you want to add text to your wotja you can do that in the TTM view in the Design screen.
| UI Item | Description / Menu Items |
 Files Files |
Back to Files screen. For details on the Save Changes popup displayed when you press this button see the description of this button in the UI Elements section. |
 Text Text |
Displays a pop-up menu where you can select:
|
 Background Background |
Go to a screen where you can set the background colour via RGB sliders or a HSB colour wheel. |
 Picture Picture |
iOS: The toggle is only shown ONCE a picture has been selected. Tap on the text otherwise displays a popup menu with the following items:
Tip: If you want to export an imageless (i.e. small) wotja to clipboard for embedding in a webpage, then from the Action menu select "Export Wotja URL to Clipboard (no image)". |
 Full Screen Full Screen(click image for large) |
Wotja A iOS Only: Tap anywhere in the center area to go Full Screen mode; when in Full Screen mode, tap anywhere to return to the Display screen. In Full Screen mode the background picture, if attached, will slowly auto-pan around the screen. |
Mixdown & Recordings

See: 'Free Mode' & Limitations
The Mixdown & Recordings screen can only be accessed from the "Mixdown & Recordings" Action menu item in Mix Mode:
- Mix Mode > Action (icon)
This screen is where you can create and preview recordings: WAV (as per Wotja Audio Output System Setting [hardware dependent]), MIDI and Video (iOS, macOS only).
These recordings are all saved to the "Wotja Folder", the location of which depends on the OS and/or whether iCloud is enabled for Wotja.
MIDI Recording Note: MIDI file recordings are saved as Type 1 files.
- In Wotja V19 Type 1 MIDI recordings combine *all* MIDI from Cells in each Track onto one MIDI channel, irrespective of the MIDI assignments in that Cell. For example, if you have a mix with content/templates in both Cell 1 Track 1 and in Cell 1 Track 2 then all MIDI from the former is recorded to MIDI channel 1, and from the latter to MIDI Channel 2, etc.
- If in Wotja V19 you wish to record to a multi-channel Type 1 MIDI file you must therefore split your content up across Cells in different Tracks. i.e. if you had content in Cell 1 which generated MIDI on Channels 1 and 2, then remove the Channel 2 MIDI content and put that into Cell 2.
Video Recording Note: When making a Video recording Wotja creates an audio recording (that you will find in the Audio segment when you next look there) and creates a video based on that recording, using the current "Display Mode" settings to provide a still image for use in the video.
Tip: For audio/video recordings you can set the music Ramp in and Ramp down times (from 0 - 20 seconds) in the Mix section of the Cell & Mix Rules panel.
Tip: Use the following apps to locate and then export/share a mixdown recording:
- iOS: iCloud enabled - Use the Apple Files app (See also this FAQ)
- iOS: iCloud not enabled - From the Wotja Mixdown & Recordings screen > Actions button > Open With... and try sharing via the options presented there; alternatively use App File Sharing (See also this FAQ)
- macOS: Finder
- Windows: Explorer
- Android: Files app (or other File Manager app); Once you have selected the file(s) you want to export/share (e.g. recordings), use the Share Menu in the Files app to do what you want (alternatively use USB to copy files off your device)
Usage:
- Set recording length: Using the top Record Bars slider control you can set the number of bars you want to record (up to 100 bars maximum by default, but extendable via the Max Bars slider control in the mix segment of Settings).
- Start the mixdown: Tap the left "Record" bottom in the bottom toolbar.
- Recording progress: The title bar will show the recording progress (e.g. 34% - 1.75 Mb) and you will see a % Recording progress popup in the middle of the screen (e.g 35%).
- Recording complete: The popup will disappear and you will see your recording show up in the list below (if you are using iCloud it might take some time depending on how long your recording is).
- Preview recording: Audio/MIDI recording: Tap it to start and stop it playing (but there is no visual indication), or use the right side tools button and select Open With; Video recording: Tap it or tap the right side Action button (tools icon) and select Open With.
Notes:
Recordings you make are saved to the Wotja iCloud folder or Wotja folder depending on the "Use iCloud" setting (iOS > Settings > Wotja > Use iCloud).
Mixdown recordings are not live recordings and they are made as fast as your device allows. To be made they require sufficient device memory to be available.
When a recording is made it is held in memory before iOS flushes it to the file system.
Bytes per second = 48000 x 2 x 2 =192,000. 100 bars of 4:4 at 60 bpm is 400 seconds of recording (just over 6 minutes). In terms of bytes this is 192000 * 400 = 77 MB. At 30 bpm, that is 154 MB.
For every 100 MB recording, you need to have space in the file system. 10 recordings will be 1 GB.
If you're using iCloud, e.g. 10 files totalling 1 GB, remember that those files are synced with the cloud.
| UI Item | Description |
 Mix button Mix button |
Tap to go to back to the Mix Mode screen. |
 Title Title |
When a recording is being made this will change to indicate the progress of the mixdown. |
 Audio/MIDI/Video selector (Video is iOS, macOS only) Audio/MIDI/Video selector (Video is iOS, macOS only) |
Tap to select which file type you want to record do. The supported mixdown recording formats are:
|
 Bars selector Bars selector |
To change the bars value either tap the "-" or "+" buttons, drag your finger along the slider or double tap it for a pop up to manually enter a value. You can increase the default value in Settings > Mix. |
 Recording Recording |
The recording item uses an icon to indicate the file type and the description shows the name, bars, tempo and date/time. Tap the recording to preview it (tapping audio/MIDI recordings can start/stop them playing, but there is no visual indication; tapping a video recording shows the Actions popup), or use the right side Action button (tools icon) and select Open With. |
 Actions Actions |
Tap the tools button shown to the right of the recording to present a pop-up action sheet with the following options: Opens a Finder window with the file selected. Opens an action sheet where you can choose how to export/share your recording to e.g. to iCloud Drive, Facebook, Dropbox etc. depending on what you have installed. See also this FAQ. In Wotja X this is how you delete your recording; in Wotja A (iOS), use the top Edit button or swipe left on the recording and press the red delete button. This allows you to preview your video. Wotja will create a video from your selected recording, using the current "Display Mode" settings to provide a still image for use in the video, and present it in the Video segment. This approach allows you to take a "finessed" recording of your generative mix, and create videos from it at your leisure. |
 Record button Record button |
Tap this to start a recording. Once a recording is being made it changes to "Stop". You can press that to stop the recording being made. As the recording is being made you will see the recording progress is displayed at the top of the screen instead of the screen title. |
 Recording Progress Recording Progress |
Shows the % progress of the mixdown recording, e.g. 34% done. |
Settings: General
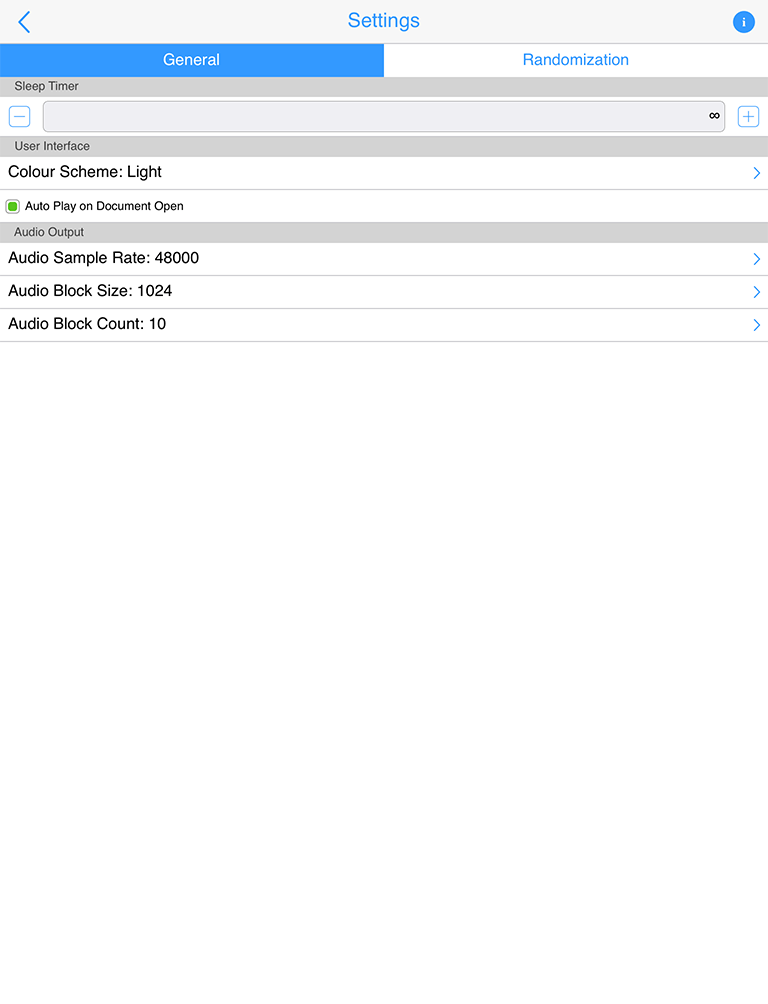
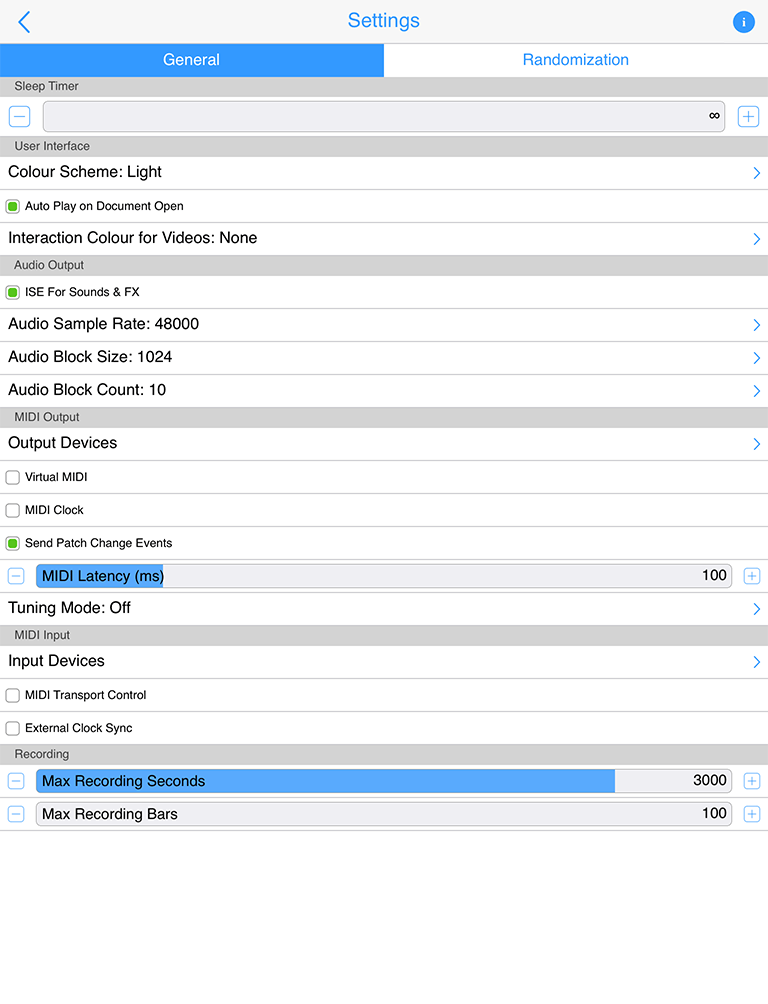
The General "segment" in Settings is where you set the Sleep timer if required, the User Interface mode (Light or Dark) and various Audio settings.
This screen is accessible from the Cog item which is shown in the Documents screen and others.
| Item | Description |
 Info Info |
Select for a popup with links to further information, such as version number, links to this user guide, website, EULA, Privacy Policy etc. |
Sleep Timer |
|
| Timer Slider | (Default: Infinite) The sleep timer can take values 1m to 60 mins. Use it to set how long you want to Wotja to play before fading out over the last few seconds of play time. The timer is off when the slider is in the near left position. You will then see the value shown as ∞. If the setting is ∞ then it means there is no sleep timer active and the only timer in operation is the Music Play Time Timeout. |
User Interface |
|
| Colour Scheme: Light/Dark | (Default: Light) This where you choose whether you want the app to use a Light or Dark scheme to suit your preference. This User Guide uses the Light scheme. Select the Light or Dark option to change theme - it is that simple! |
| Auto Play on Document Open | (Default: Enabled) This setting simply means that when you open any file it will start to play. |
Audio Output |
|
| Audio Sample Rate | (Default: 48 kHz or 44 kHz auto selected depending on device capabilities [iOS, macOS, Windows]; 22Khz [Android]). |
| Audio Block Size (iOS, Android) | (Default: 1024 samples [iOS]; 2048 [Android]). This setting is of particular use if you are using Wotja on an older device. Used in conjuction with Audio Block Count. |
| Audio Block Count (iOS, Android) | (Default: 10 [iOS]; 5 [Android]). This setting is of particular use if you are using Wotja on an older device. Is the number of Audio Blocks of size determined in Audio Block Size setting. |
 Store
StoreSettings: Randomization
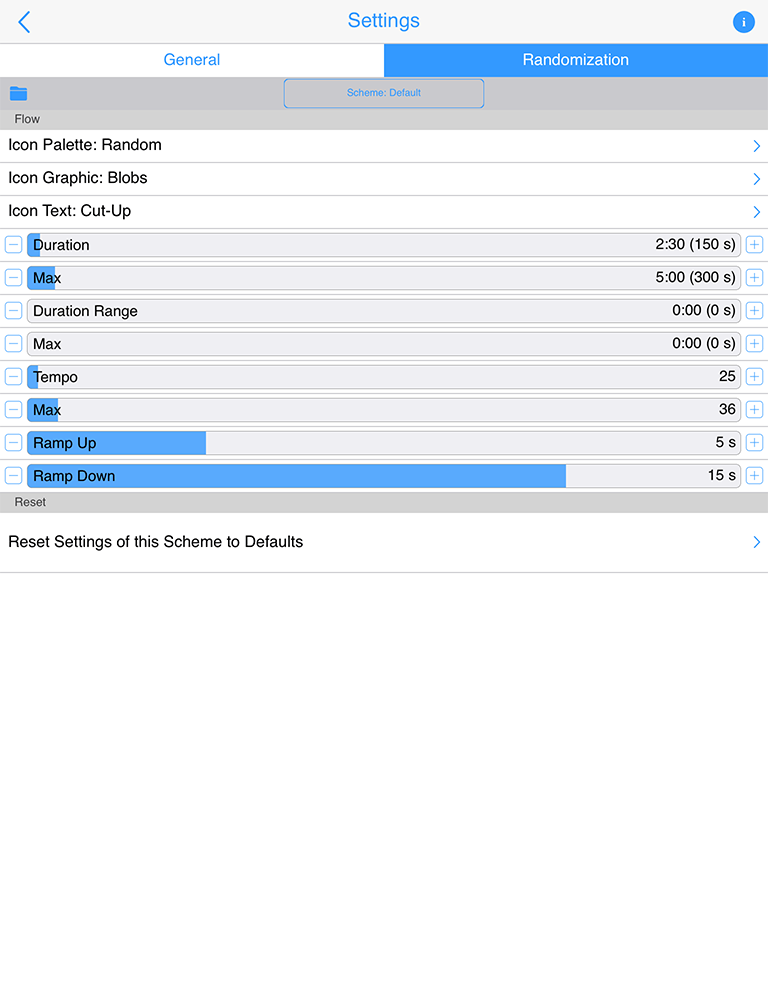


The Randomization "segment" in the Settings screen is a very powerful screen.
It is where you select the Randomization Scheme used for Randomization as well as being able to override the values of Randomization parameters.
Randomization parameters determine both how the mixes in Flow are created and whether text is displayed on screen in Flow mode.
| Parameter | Description |
Schemes |
|
 Open Open |
Opens the Scheme list. |
 Selected Scheme Selected Scheme |
Shows the selected Randomization Scheme. |
Automatic album (Box)/Flow |
|
| Icon Palette | Default - Random: Select from one of 35 includes palettes for auto-icon generation in Boxes or Mixes. |
| Icon Graphic | Default - Blobs: Select from 2 different kinds of icon graphic styles for auto-icon generation in Boxes or Mixes. The choices are: Blobs or Geometric. |
| Icon Text | Default - TTM: Select what text, if any, you want to display in your icon. The choices are: TTM, Cut-Up or none. |
| Mixes in Box | Default - 8: The minimum number of mixes in an automatically generated Box. |
| Max (Mixes in Box) | Default - 8: The maximum number of mixes in an automatically generated Box. |
| Duration | Default - 2.5 m (150 s): The minimum time a mix is configured to play for in an automatically generated Box. |
| Max (Duration) | Default - 5 m (300 s): The maximum time a mix is configured to play for in an automatically generated Box. |
| Duration Range | Default - 0 s: The minimum duration that is added to a mix's Duration above when the Box is created. |
| Max (Duration Range) | Default - 0 s: The maximum duration that is added to a mix's Duration above when the Box is created. |
| Tempo | Default - 25 BPM: The minimum tempo of a mix. |
| Max (Tempo) | Default - 36 BPM: The maximum tempo of a mix. |
| Ramp Up | Default - 5 s: How long a mix takes to ramp up to its full volume. |
| Ramp Down | Default - 15 s: How long a mix takes to ramp down to zero volume. |
| Reset All Random Settings | Resets all values back to their Defaults. |
 Save
SaveSettings: Templates
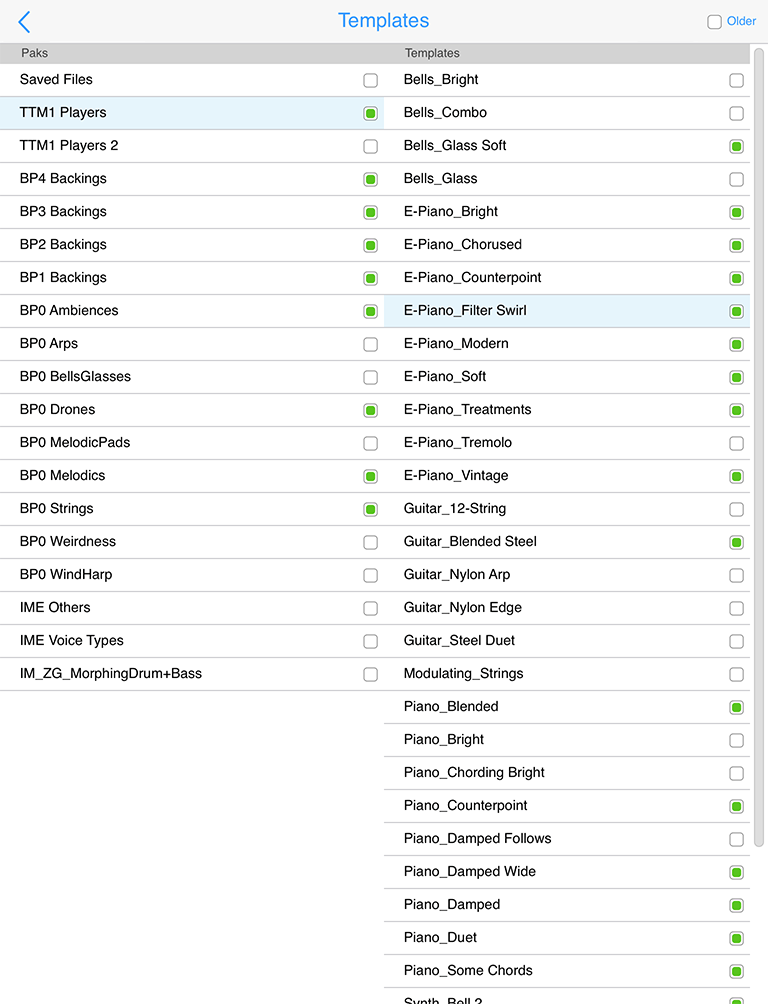

 Paks
Paks Templates
 Older?
Settings: iCloud

IMPORTANT: To use iCloud in Wotja you MUST have set up/toggled on iCloud Drive ("iCloud Drive") - See also Apple's iCloud Help resource.
IOS IMPORTANT: You must ALSO have the relevent Wotja App's "Apps Using iCloud" toggle AND the relevent app's Settings "Use iCloud" both toggled on. If you do not want to use iCloud with Wotja turn them both off. If both have different toggle states then when you launch Wotja it can crash. We know it is confusing, sorry!
Using Wotja with iCloud enabled makes it easy to edit/use Wotja files across multiple devices, be they iPhones, iPads, Macs or Windows PCs. When it is enabled then all Wotja files in the iCloud Drive folder are all stored in the cloud, also a great form of backup!
iOS - Set up/Use iCloud Drive:
This screen is where you both turn on the "iCloud Drive" toggle and then set what apps can use it for file saving using the relevant "Apps Using iCloud" toggle.
This screen is accessed as follows: From the iOS Settings Screen > Apple ID, iCloud, iTunes & App Store (Your Name) > iCloud (see also Apple's iCloud Help resource)
- "iCloud Drive" toggle: This is found after the iCloud Backup toggle. It must be toggled on for any app (including Wotja!) to use iCloud Drive to save data.
- "Apps Using iCloud" section toggles: Scroll further down the screen to find the version of Wotja that you have installed and then turn the toggle on (e.g. Wotja Pro 19). Both this and the Wotja "Use iCloud" must have the same toggle status or you can get a crash on launching Wotja.
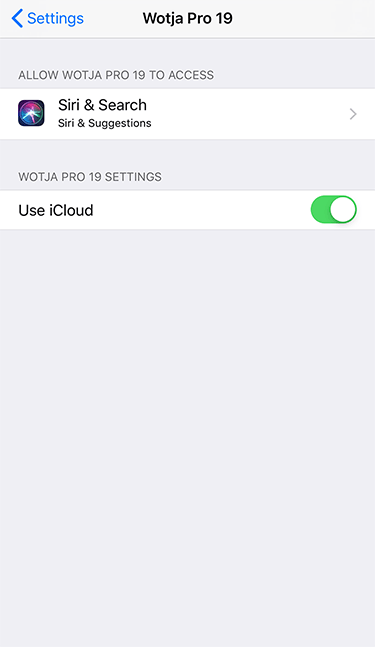
iOS - Wotja "Use iCloud" toggle:
This screen is where you set whether Wotja can use Mobile Data and whether or not it uses iCloud for file saving. It is accessed from the iOS Settings Screen.
- Wotja "Use iCloud" toggle: Scroll down the iOS Settings screen to find the version of Wotja that you have installed, tap on it and then in the ensuing screen find the App Settings section (e.g. Wotja Pro 19 Settings) and turn on the toggle "Use iCloud". Both this and the Wotja "Use iCloud" must have the same toggle status or you can get a crash on launching Wotja.
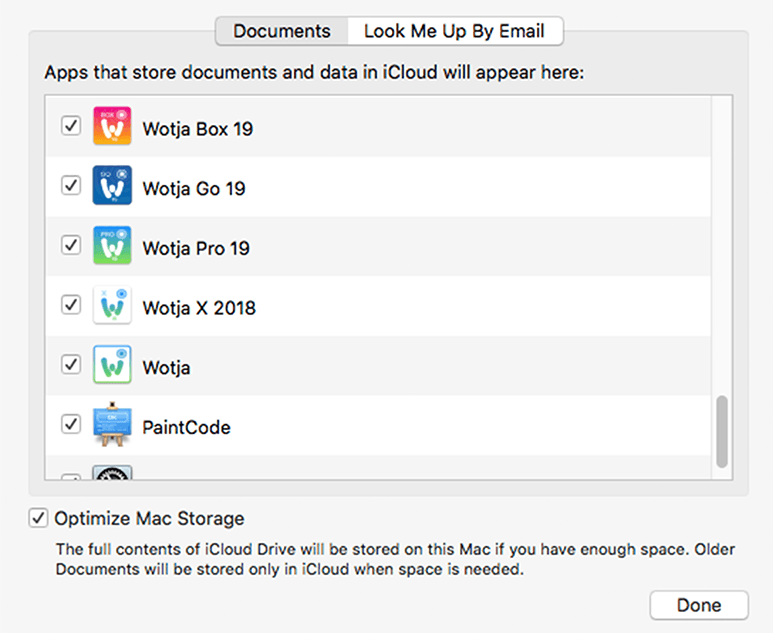
macOS - "iCloud Drive" / Wotja "Use iCloud":
See also Apple's iCloud Help resource.
- "iCloud Drive" toggle: From the macOS System Preferences screen go into iCloud and in the ensuing iCloud screen ensure the iCloud Drive setting is toggled on.
- Wotja "iCloud Drive" toggle: In the iCloud screen above tap on the iCloud Drive "Options" button and in the ensuing screen (shown left) select the Documents tab and scroll down the screen to find the version of Wotja that you have installed and then turn the toggle on (e.g. Wotja Pro 19).
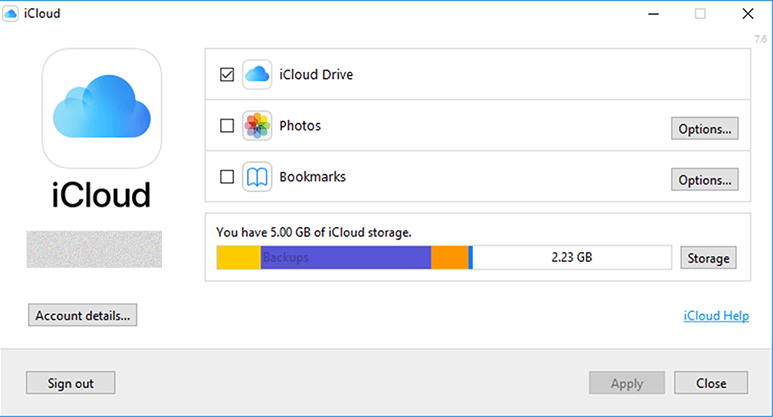
Wotja iCloud Drive App screen (Windows):
The Windows iCloud Drive app is required to enable/synch iCloud files on your Windows PC (and thus the Wotja iCloud Drive folder). To set it up find/load the Windows iCloud Drive app and ensure iCloud Drive is toggled on.
Important Note: Wotja for Windows will by default save Wotja files to the Wotja Folder (you can however choose to save to the Wotja iCloud Drive folder using File Save As). All mixdown recordings are always saved to the Wotja Folder. The Wotja Documents screen will, however, only display/load files from the Wotja Folder. If you have saved Wotja files to the Wotja iCloud Drive folder then to see them in the Documents screen simply move them to the Wotja Folder and then press the Action button in the Documents screen and select refresh.
In-App Store
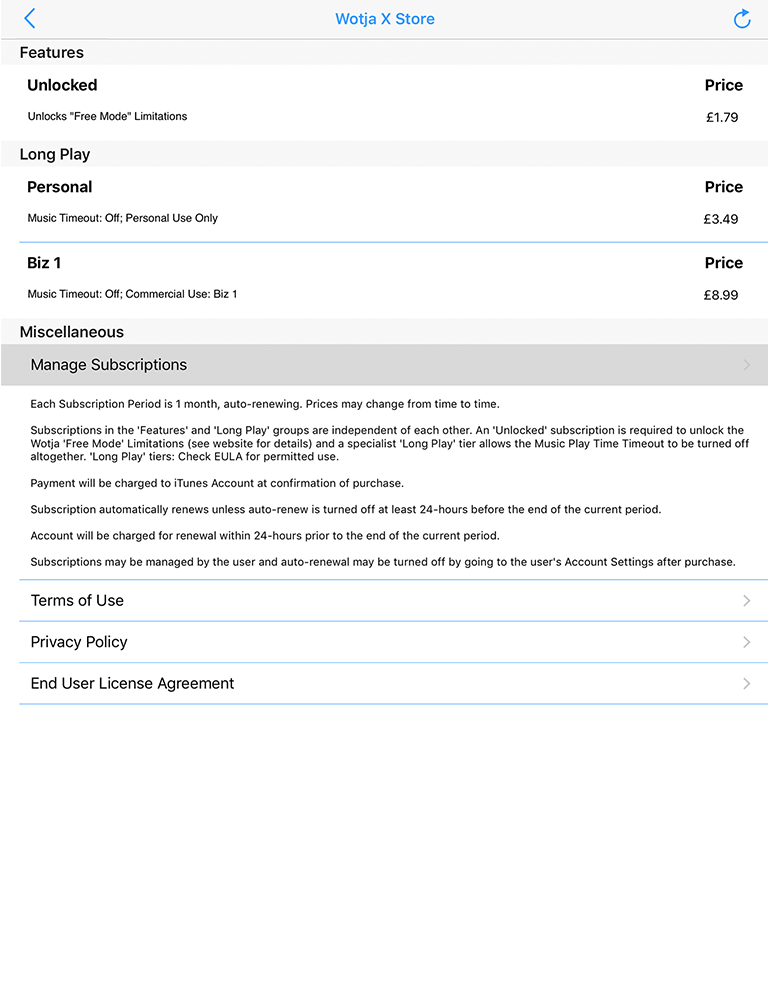
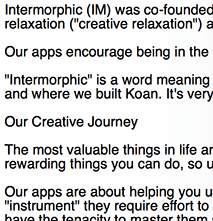
The subscription versions of Wotja contain an In-App Store where you can purchase an In-App Subscription. The image shows the current In-App Subscription tiers. See the 'Long Play' Tier FAQ for further details on what those tiers are for.
Tip: When the 'Unlocked' In-App Subscription expires then the limitations in 'Free Mode' are re-instated.
For Apple information on managing subscriptions please refer to : https://support.apple.com/en-us/HT202039
Note: There is no In-App Store in the non-subscription 'annual' version of Wotja X (e.g. Wotja X 2018) because it does not include any auto-renewing In-App Subscriptions. Nor at present does it have any one-off In-App Purchases.
| Item | Description |
 Settings Settings |
Returns you to the Settings Screen. |
 Restore Restore |
Tap this button and you will be asked if you want to check for and restore any previous purchases. |
 IAP Item IAP Item  Price Price  Subscribed Subscribed |
If you have purchased an In-App Subscription, and it is active, then "Subscribed" will show instead of the price. |
 Manage Subscriptions Manage Subscriptions |
The "Manage Subscriptions" button in the Miscellaneous" section takes you straight to the Wotja subscription page in the relevant Apple App Store where you can manage your subscription. See also the FAQ entry on in-app subscriptions. |
Credits
Intermorphic is Tim Cole & Pete Cole - yes, just two brothers - and we have now been working together in generative music since 1990. However, without the incredible support and interest from so many over the years then we would not be where we are today with our current Apps, Engines and Content. Our thankyou list below is an ever expanding one, in no particular order, and does not include everyone (sorry to those we have missed!). We offer our heartfelt thanks and gratitude to:
- All our old friends and colleagues from SSEYO days including from the early days Jon Pettigrew, John Wilkinson, Steve Crawshaw & Chandra Modi and including from later days (1996 onwards) Jerry Leach, Paul Blampied, Jerry Swan, Nick Barefoot, Simon Robertson, Kerry-Anna Saia, Natalie Da Gama Rose, John Tenkoni and also including Jesper Bennedbaek, Wenwu Wang etc. from our Tao Group audio days (we are focusing primarily on audio and so there are way too many to list here, but they include all those who went on to work at Antix Labs!)
- Timothy Didymus and Mark Harrop, longstanding friends, colleagues and artists with incredible talent whose sublime generative music creations have, on the many occasions when times were hard, given us the much needed inspiration to press onwards.
- All customers, and most especially those who wish to continue with us as we move forward - we love you, thank you!
- Everyone who made contributions to our forums, has helped others and given feedback or who has blogged, tweeted, facebooked or otherwise written nicely about or shared content they have made with our apps and in so doing helped others to find us - we love you, thank you!
- Our outstanding beta testers for their testing efforts and everyone who has given feedback, found bugs and helped with suggestions.
- Early content creators such as David Muddyman, Andrew Garton, Paul Weir and Igor Dvorkin.
- Finally, a big thanks to Brian Eno for his support and kindness to us in the SSEYO Koan years, out of which arose his pioneering release '"Generative Music 1" with SSEYO Koan Software'.